

Spring入门-Aop
发布于2021-05-29 22:20 阅读(741) 评论(0) 点赞(27) 收藏(2)
Aware接口
在一些业务场景下,可能会遇到一些类需要获取到容器的一些信息,那就可以通过Aware接口来实现。
Aware有很多实现类
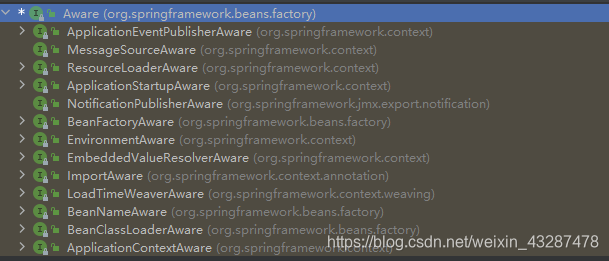
每一个子接口都提供了一个set方法,方法的参数就是容器的一些变量信息,我们可以在bean中声明相关的成员变量来接受这个参数,接收到这个参数后就可以获取到详细信息了。
定义AwareService类
实现多个接口
@Service
@PropertySource(value = "javaboy.properties")
public class AwareService implements BeanNameAware, BeanFactoryAware, ResourceLoaderAware, EnvironmentAware {


    private String beanName;
    private  ResourceLoader resourceLoader;
    private Environment environment;


    public void output() throws IOException {
        System.out.println("beanName = " + beanName);
        //读取javaboy.txt
        Resource resource = resourceLoader.getResource("javaboy.txt");
        BufferedReader br = new BufferedReader(new InputStreamReader(resource.getInputStream()));
        String s = br.readLine();
        System.out.println("s = " + s);
        br.close();
        //读取properties的属性
        String property = environment.getProperty("javaboy.address");
        System.out.println("property = " + property);
    }


    /**
     * 获取bean的生成 工厂
     * @param beanFactory
     * @throws BeansException
     */
    public void setBeanFactory(BeanFactory beanFactory) throws BeansException {

    }

    /**
     * 获取bean的名字
     * @param s
     */
    public void setBeanName(String s) {
        this.beanName = s;
    }


    public void setEnvironment(Environment environment) {
        this.environment = environment;
    }

    public void setResourceLoader(ResourceLoader resourceLoader) {
        this.resourceLoader = resourceLoader;
    }
}
配置扫描类
@Configuration
@ComponentScan
public class JavaConfig {
}
获取信息
public class Main {


    public static void main(String[] args) throws IOException {

        AnnotationConfigApplicationContext ctx = new AnnotationConfigApplicationContext(JavaConfig.class);
        AwareService bean = ctx.getBean(AwareService.class);

        bean.output();


    }

}
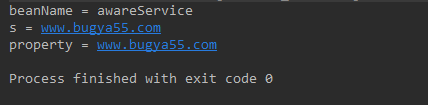
结果
Aop切面编程
Aop是Spring中核心特性之一,面向切面编程,就是在程序运行时,不改变程序源码的情况下,动态的增强方法,实现对业务功能扩充。如:
- 日志
- 事务
- 权限认证
- 数据库操作
…
在Aop中,常见的概念:
| 概念 | 说明 |
|---|---|
| 切点 | 要添加代码的地方,叫做切点 |
| 通知 | 通知就是向切点动态添加的代码 |
| 切面 | 切点+通知 |
| 连接点 | 切点的定义 |
Aop的实现
Aop实际上时基于Java动态代理来实现的。
Java中的动态代理有两种方式:
- cglib
- jdk
cglib:如果要代理的对象,实现了某个接口,那么Spring Aop会使用jdk代理去创建代理对象。
jdk:对于没有实现接口的对象,使用cglib代理。
动态代理
基于JDK的动态代理实现
- 定义一个计数器接口
public interface MyCalculator {

    int add(int a, int b);
}
- 定义计算机接口的实现
public class MyCalculatorImpl implements MyCalculator {
    public int add(int a, int b) {
        return a+b;
    }
}
- 定义代理类
public class CalculatorProxy {

    public static Object getInsetance(final MyCalculatorImpl myCalculator) {

        return Proxy.newProxyInstance(CalculatorProxy.class.getClassLoader(), myCalculator.getClass().getInterfaces(), new InvocationHandler() {
            /**
             *
             * @param proxy 代理对象
             * @param method 代理的方法
             * @param args 方法的参数
             * @return 方法的返回值
             * @throws Throwable
             */
            public Object invoke(Object proxy, Method method, Object[] args) throws Throwable {

                System.out.println(method.getName() + ":方法开始执行了");
                Object invoke = method.invoke(myCalculator, args);
                System.out.println(method.getName() + ":方法结束执行了");
                return invoke;
            }
        });
    }
}
Proxy.newProxyInstance接受三个参数,第一个时classloader,第二个是代理实现的接口,第三个是代理对象方法的处理器,基于反射动态对功能进行加强。
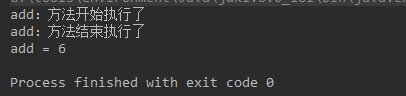
- 结果测试
public class Main {
    public static void main(String[] args) {
        MyCalculatorImpl myCalculator = new MyCalculatorImpl();
        MyCalculator calculator = (MyCalculator) CalculatorProxy.getInsetance(myCalculator);
        int add = calculator.add(1, 5);
        System.out.println("add = " + add);
    }
}
五种通知
Aop的通知类型有5种:
- 前置通知
- 后置通知
- 异常通知
- 返回通知
- 环绕通知
通知就是对原有代码上进行功能加强。
添加相关pom依赖
        <dependency>
            <groupId>org.springframework</groupId>
            <artifactId>spring-context</artifactId>
            <version>5.3.5</version>
        </dependency>

        <dependency>
            <groupId>org.aspectj</groupId>
            <artifactId>aspectjweaver</artifactId>
            <version>1.9.7.M2</version>
        </dependency>
        <dependency>
            <groupId>org.aspectj</groupId>
            <artifactId>aspectjrt</artifactId>
            <version>1.9.7.M2</version>
        </dependency>
定义切点切面
有两种方式,自定义注解和使用规则方式,使用规则比较常用。
自定义注解
@Target(ElementType.METHOD)
@Retention(RetentionPolicy.RUNTIME)
public @interface Action {
}
在需要拦截的方法上添加该注解
public class MyCalculatorImpl implements MyCalculator {
    @Action
    public int add(int a, int b) {
        return a+b;
    }
}
接下来,定义通知
@Component
@Aspect //表明这是个切面
public class LogAspect {


    /**
     * 前置通知
     *
     * @param joinpoint
     */
    @Before("@annotation(Action)")
    public void before(JoinPoint joinpoint) {
        String name = joinpoint.getSignature().getName();
        System.out.println(name + "方法执行开始...");
    }

    /**
     * 后置通知
     * @param joinPoint
     */
    @After("@annotation(Action)")
    public void after(JoinPoint joinPoint) {
        String name = joinPoint.getSignature().getName();
        System.out.println(name + "方法执行结束...");
    }

    /**
     * 返回通知
     * @param joinpoint
     * @param r
     */
    @AfterReturning(value = "@annotation(Action)", returning = "r")
    public void returning(JoinPoint joinpoint, Integer r) {
        String name = joinpoint.getSignature().getName();
        System.out.println(name + "方法返回通知:" + r);
    }


    /**
     * 异常通知,当目标方法抛出异常时触发
     * @param joinPoint
     */

    @AfterThrowing(value = "@annotation(Action)",throwing = "e")
    public void afterThrowing(JoinPoint joinPoint,Exception e ) {
        String name = joinPoint.getSignature().getName();
        System.out.println(name+ "方法异常通知:" + e.getMessage());
    }

    /**
     * 环绕通知
     * @param pjp
     * @return
     */
    @Around("@annotation(Action)")
    public Object around(ProceedingJoinPoint pjp) throws Throwable {

        //这个方法类似method.invoke方法,可以在它前后添加日志
        Object proceed = pjp.proceed(new Object[] {1,7});
        return proceed;
    }
}
自动扫描,注入到bean中去
@Configuration
@ComponentScan
@EnableAspectJAutoProxy //开启自动代理,aop需要加上
public class JavaConfig {
}
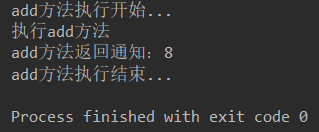
测试类
    public static void main(String[] args) {
//        test1();
        AnnotationConfigApplicationContext ctx = new AnnotationConfigApplicationContext(JavaConfig.class);
        MyCalculator cau = ctx.getBean(MyCalculator.class);
        cau.add(1,4);
        cau.min(3,2);
    }
统一定义切点
定义一个切点方法,然后进行其他通知引用这个方法就可以,方便维护。
    @Pointcut("@annotation(Action)")
    public void pointcut() {

    }


    /**
     * 前置通知
     *
     * @param joinpoint
     */
    @Before("pointcut()")
    public void before(JoinPoint joinpoint) {
        String name = joinpoint.getSignature().getName();
        System.out.println(name + "方法执行开始...");
    }
非侵入式切点
侵入式是根据一定的匹配规则进行拦截。
    @Pointcut("execution(* com.bug.aop.service.*.*(..))")
    public void pointcut() {

    }

    /**
     * 前置通知
     *
     * @param joinpoint
     */
    @Before("pointcut()")
    public void before(JoinPoint joinpoint) {
        String name = joinpoint.getSignature().getName();
        System.out.println(name + "方法执行开始...");
    }
这种就不需要在使用action注解去指定哪个方法需要进行切入了。
Xml配置Aop
切面类中不加注解,使用xml来实现
    /**
     * 前置通知
     *
     * @param joinpoint
     */
    public void before(JoinPoint joinpoint) {
        String name = joinpoint.getSignature().getName();
        System.out.println(name + "方法执行开始...");
    }
xml中配置切点和切面信息
    <!-- aop配置-->
    <bean class="com.bug.aop.LogAspectXml" id="logAspectXml"></bean>
    <bean class="com.bug.aop.service.MyCalculatorImpl" id="myCalculator"></bean>

    <aop:config>
        <aop:pointcut id="pointcut" expression="execution(* com.bug.aop.service.*.*(..))"/>
        <aop:aspect ref="logAspectXml">
            <aop:before method="before" pointcut-ref="pointcut"/>
            <aop:after method="after" pointcut-ref="pointcut"/>
            <aop:after-returning method="returning" pointcut-ref="pointcut" returning="r"/>
            <aop:after-throwing method="afterThrowing" pointcut-ref="pointcut" throwing="e"/>
            <aop:around method="around" pointcut-ref="pointcut"/>
        </aop:aspect>
    </aop:config>
定义类进行测试
    public static void main(String[] args) {
        ClassPathXmlApplicationContext ctx = new ClassPathXmlApplicationContext("application.xml");
        MyCalculator myCalculator = (MyCalculator) ctx.getBean("myCalculator");
        myCalculator.add(5,1);
    }
发现也实现了aop功能,没问题。
原文链接:https://blog.csdn.net/weixin_43287478/article/details/116958069
所属网站分类: 技术文章 > 博客
作者:我长得真不赖
链接:http://www.javaheidong.com/blog/article/207570/48608a2e4a164dcb7d87/
来源:java黑洞网
任何形式的转载都请注明出处,如有侵权 一经发现 必将追究其法律责任
昵称:
评论内容:(最多支持255个字符)
---无人问津也好,技不如人也罢,你都要试着安静下来,去做自己该做的事,而不是让内心的烦躁、焦虑,坏掉你本来就不多的热情和定力