

秒杀系统 - 项目框架搭建
发布于2021-05-30 00:06 阅读(1317) 评论(0) 点赞(8) 收藏(2)
SprintBoot文档
快速启动SpringBoot
SpringBoot 1.5.8.RELEASE文档
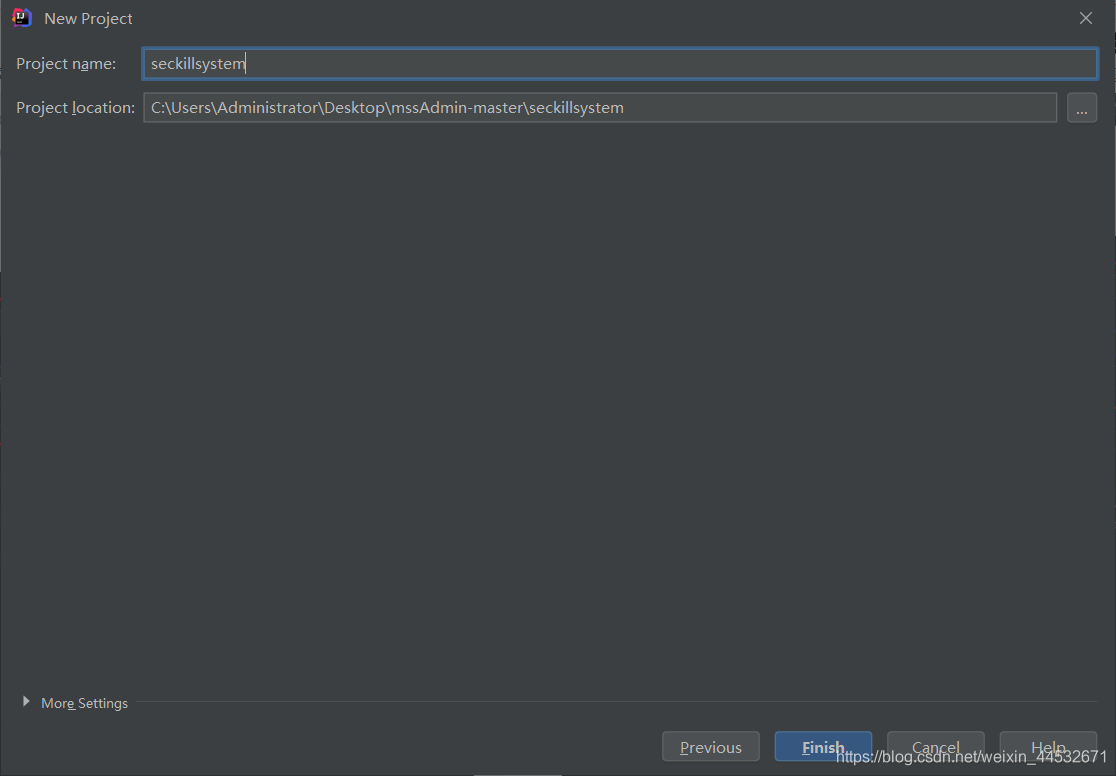
创建项目
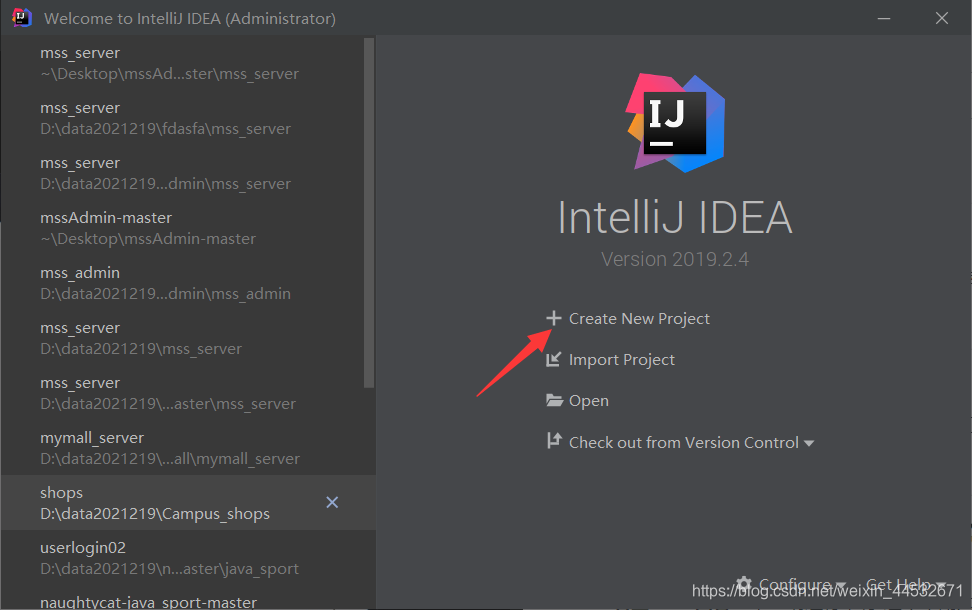
打开idea。
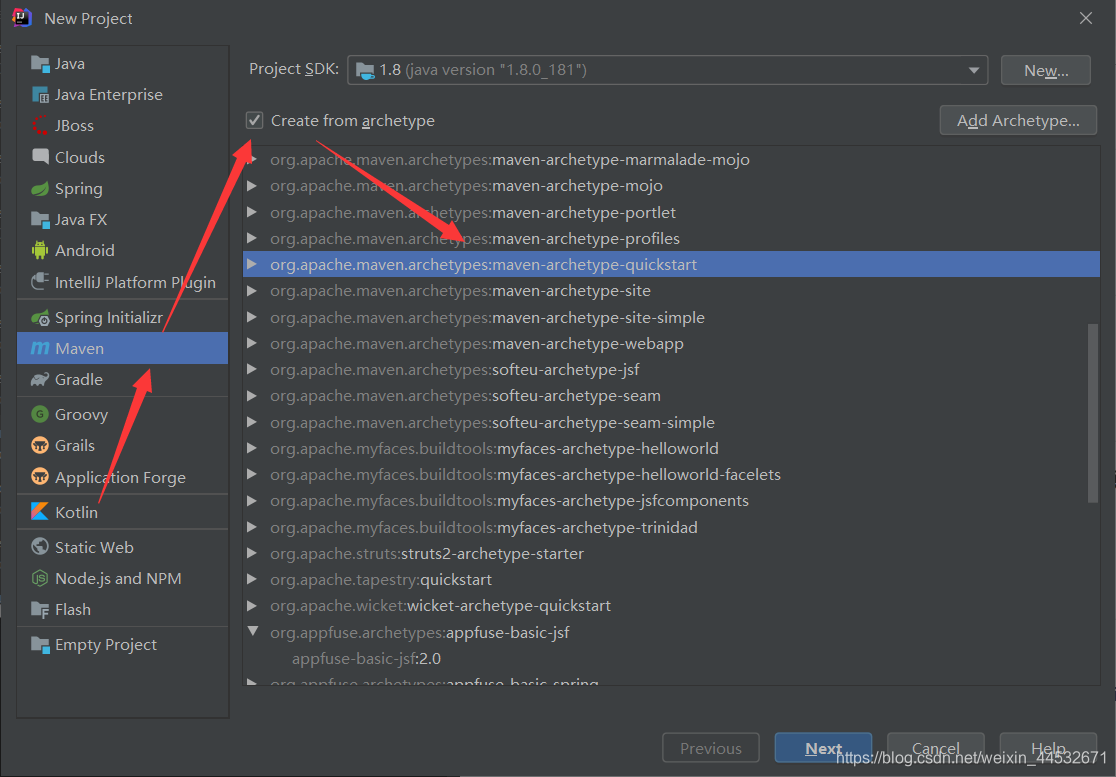
从archetype(典型)创建项目,选择quick-start
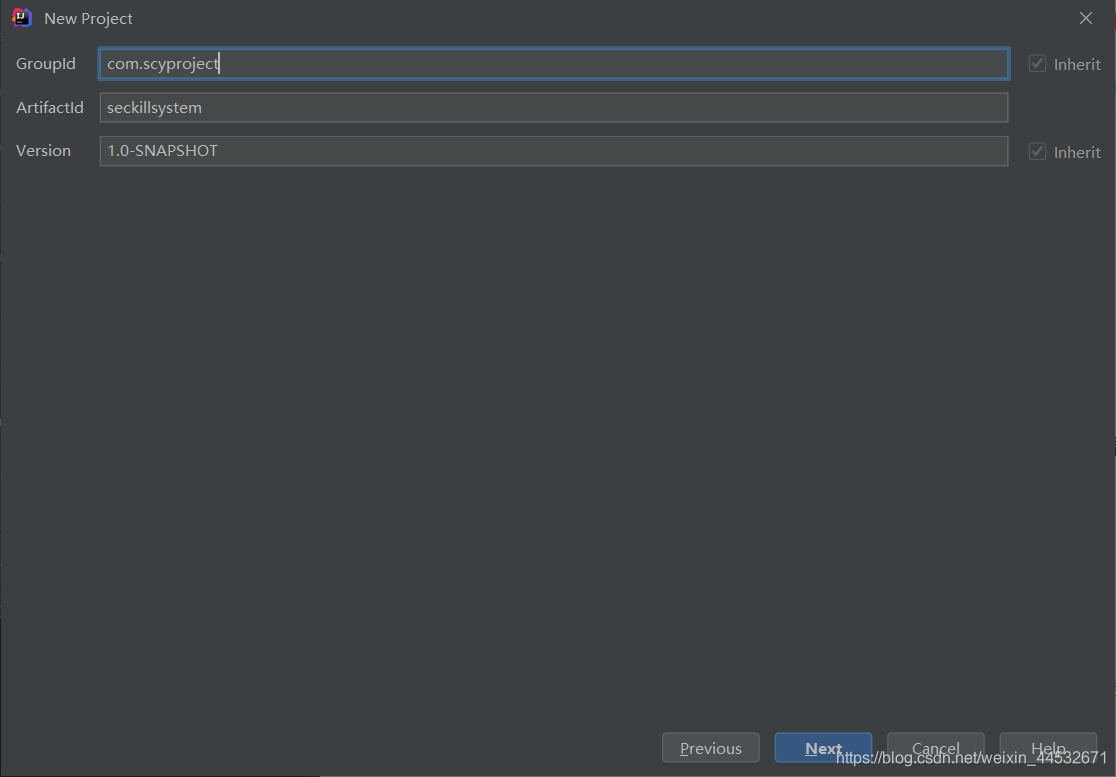
设置GroupId和ArtifactId
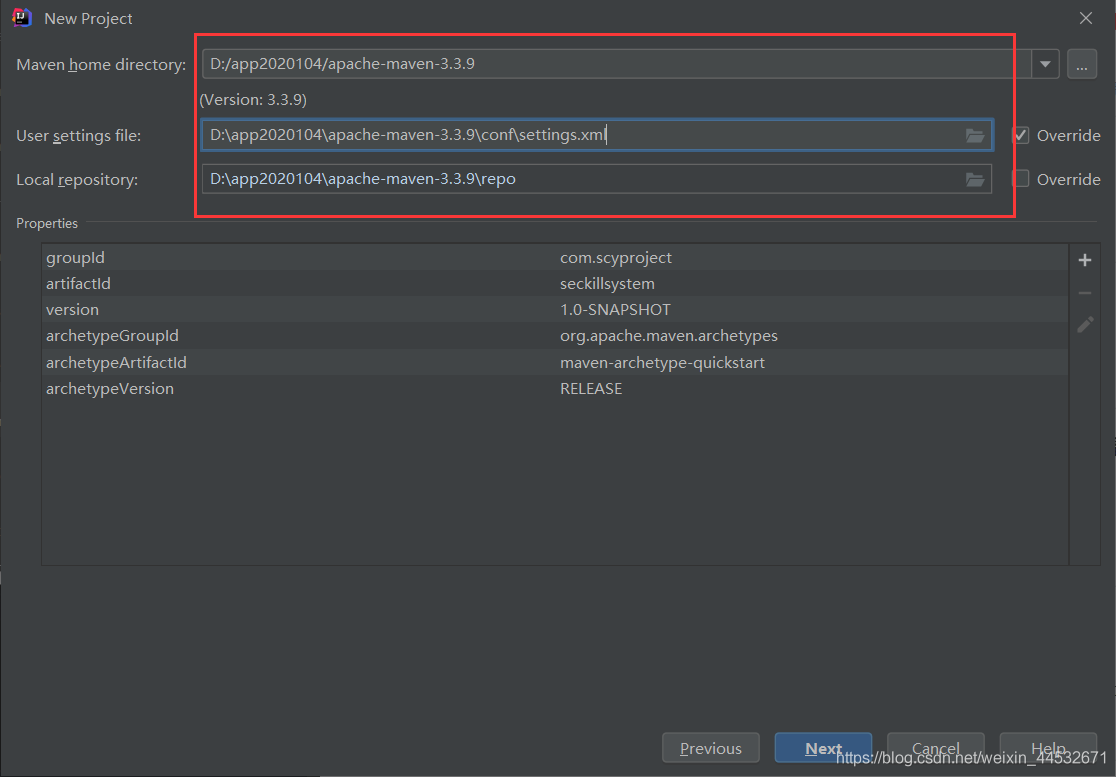
配置maven
设置文件路径,finish
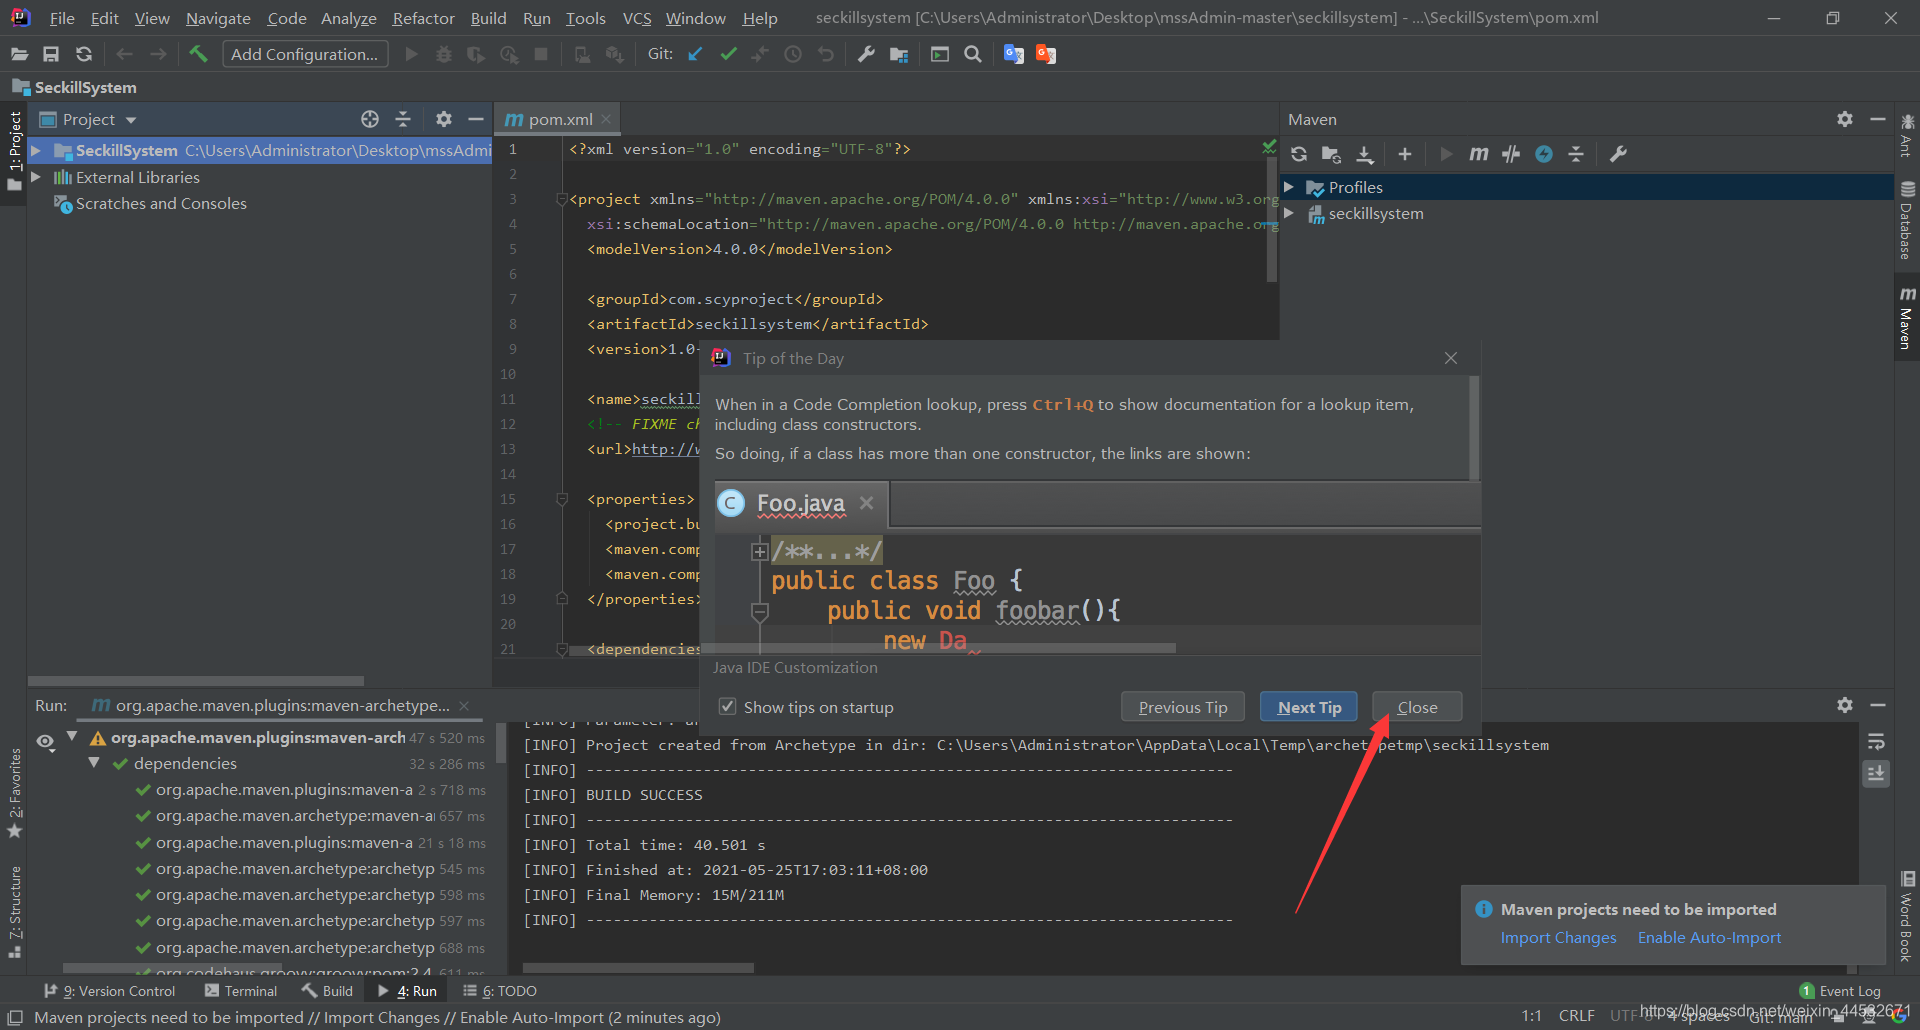
创建完成
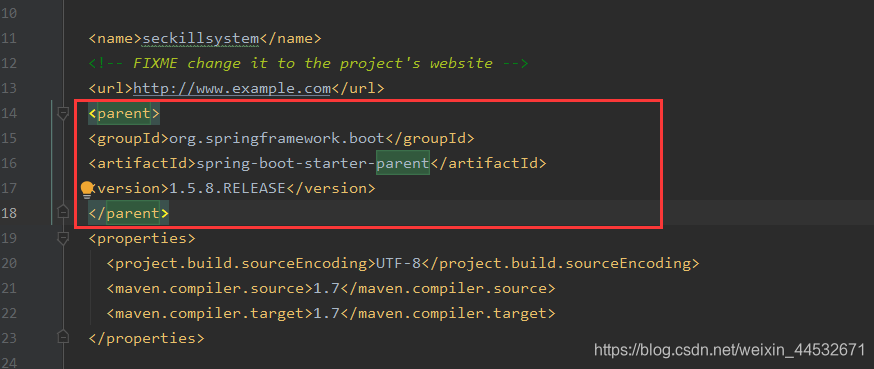
pom文件添加parent依赖
  <parent>
    <groupId>org.springframework.boot</groupId>
    <artifactId>spring-boot-starter-parent</artifactId>
    <version>1.5.8.RELEASE</version>
  </parent>
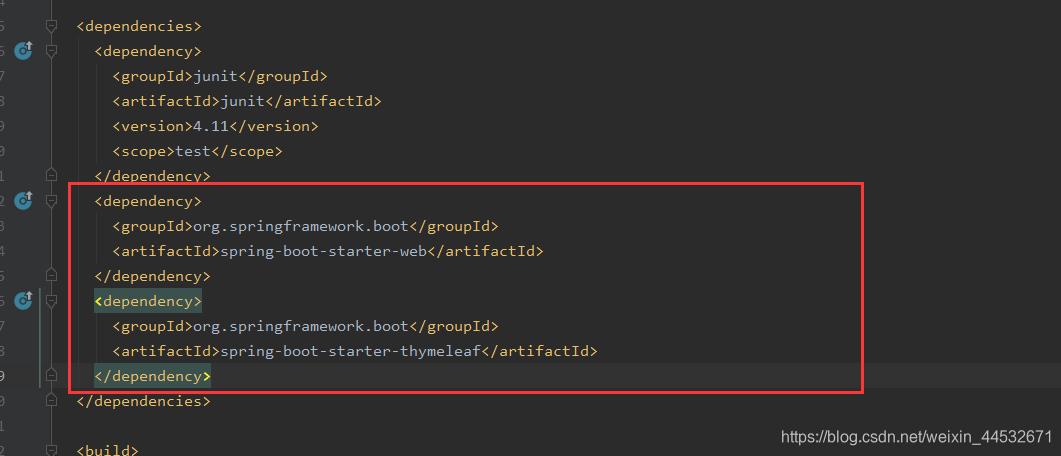
集成SprintBoot,thymeleaf ,添加依赖。
    <dependency>
      <groupId>org.springframework.boot</groupId>
      <artifactId>spring-boot-starter-web</artifactId>
    </dependency>
    <dependency>
      <groupId>org.springframework.boot</groupId>
      <artifactId>spring-boot-starter-thymeleaf</artifactId>
	</dependency>
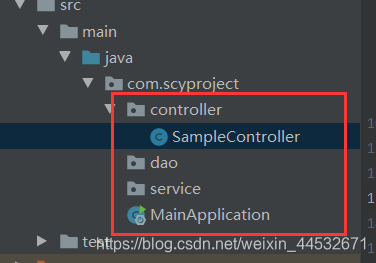
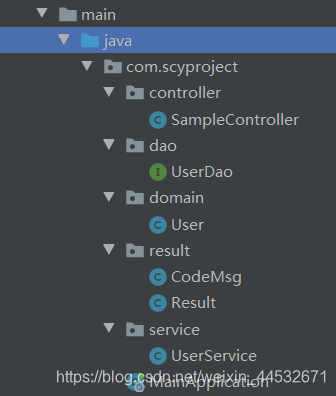
新建类MainApplication.java,删除无用的App.java文件
package com.scyproject;

import org.springframework.boot.SpringApplication;
import org.springframework.boot.autoconfigure.SpringBootApplication;

@SpringBootApplication
public class MainApplication {
    public static void main(String[] args) {
        SpringApplication.run(MainApplication.class,args);
    }
}
至此配置完毕,可以加controller,dao,service层编写代码了。
请求相关
封装Result类
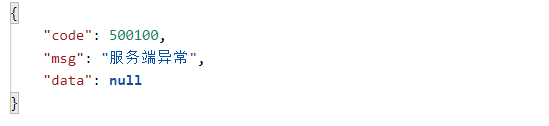
请求返回的json数据比较规范的写法要应该是code,msg,data三个部分。
CodeMsg
package com.scyproject.result;

import com.sun.org.apache.bcel.internal.classfile.Code;

public class CodeMsg {
    private int code;
    private String msg;
    //定义常量,方便直接用。
    public static CodeMsg SUCCESS  = new CodeMsg(0,"success");
    public static CodeMsg SERVER_ERROR = new CodeMsg(500100,"服务端异常");

    public int getCode() {
        return code;
    }

    public void setCode(int code) {
        this.code = code;
    }

    public String getMsg() {
        return msg;
    }

    public void setMsg(String msg) {
        this.msg = msg;
    }

    public CodeMsg(int code, String msg) {
        this.code = code;
        this.msg = msg;
    }
}
Result类
package com.scyproject.result;

import org.springframework.web.bind.annotation.ResponseBody;

public class Result<T> {
    private int code;
    private String msg;
    private T data;

    /*
    * 成功的时候调用
    * */
    public static <T> Result<T>success(T data){
        return new Result<T>(data);
    }
    /*
    * 失败时调用
    * */
    public static <T>Result<T> error(CodeMsg cm){
        return new Result<T>(cm);
    }

	public Result(int code, String msg, T data) {
        this.code = code;
        this.msg = msg;
        this.data = data;
    }

    public Result(T data) {
        this.code = 0;
        this.msg = "success";
        this.data = data;
    }

    private Result(CodeMsg msg) {
        if(msg == null)
            return;
        this.msg = msg.getMsg();
        this.code = msg.getCode();
    }

    public int getCode() {
        return code;
    }

    public void setCode(int code) {
        this.code = code;
    }

    public String getMsg() {
        return msg;
    }

    public void setMsg(String msg) {
        this.msg = msg;
    }

    public T getData() {
        return data;
    }

    public void setData(T data) {
        this.data = data;
    }


}
使用
请求内容
请求字符串
代码
格式如下
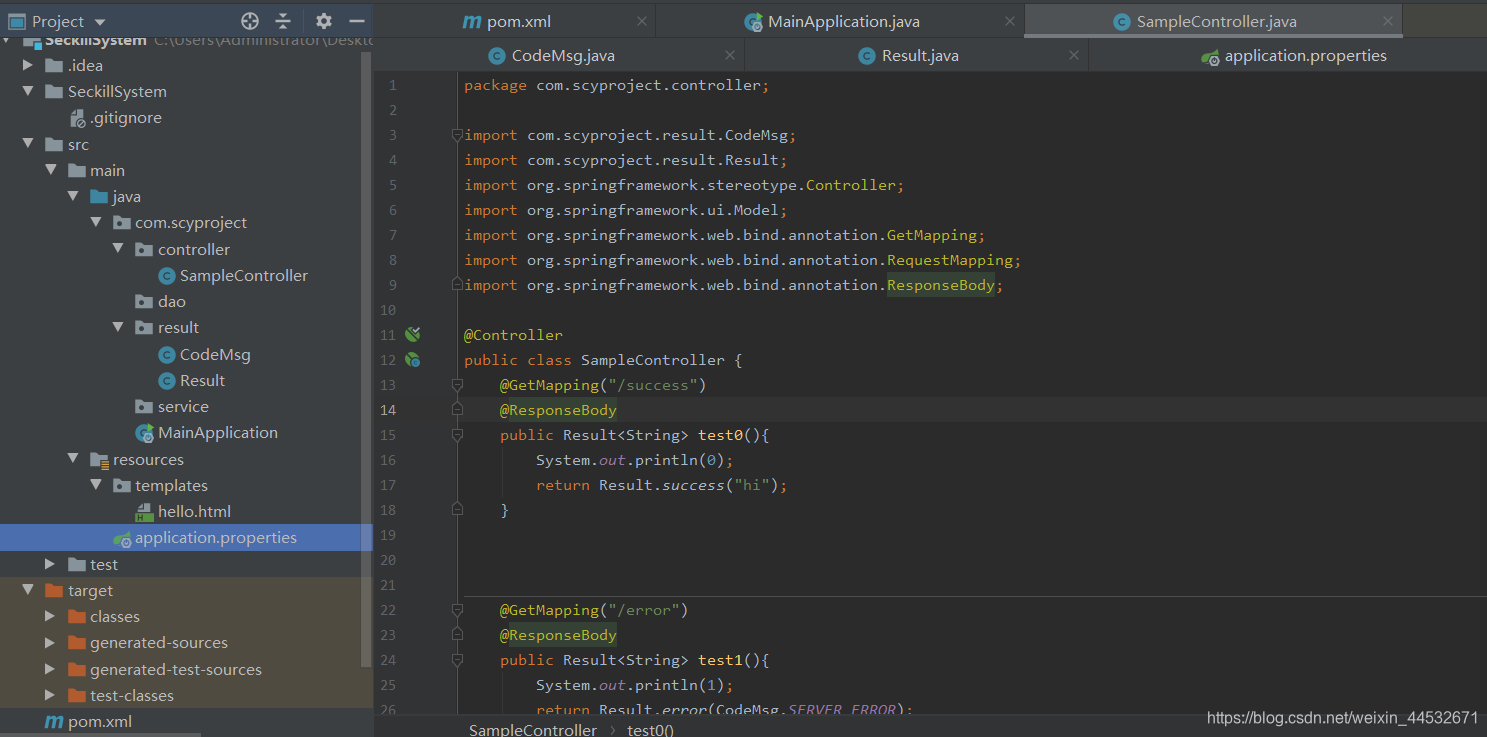
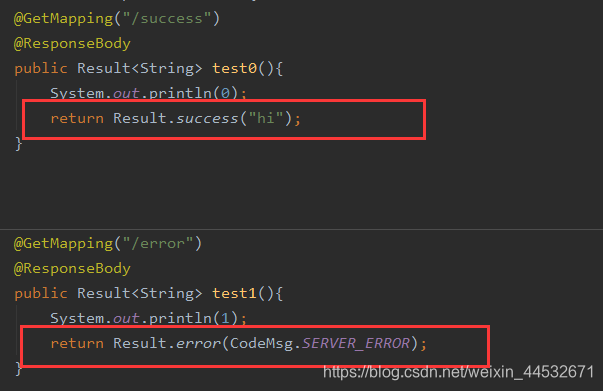
controller/SampleController.java
    @GetMapping("/error")
    @ResponseBody
    public Result<String> test1(){
        System.out.println(1);
        return Result.error(CodeMsg.SERVER_ERROR);
    }
效果
请求页面
代码
controller/SampleController.java 添加
    @RequestMapping("/thymeleaf")
    public String thymeleaf(Model model){
        System.out.println("o");
        model.addAttribute("name","scy");
        return "hello";
    }
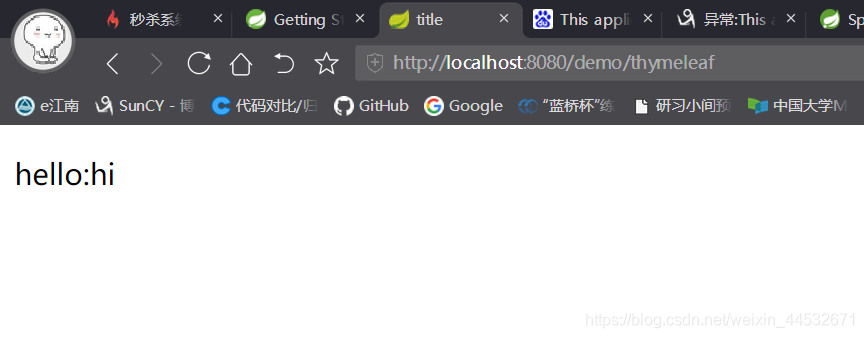
hello.html
<!DOCTYPE HTML>
<html xmlns:th="http://www.thymeleaf.org">
<head>
    <title>title</title>
    <meta http-equiv="Content-Type" content="text/html; charset=UTF-8" />
</head>
<body>
<p th:text="'hello:'+${name}" ></p>
</body>
</html>
application.properties 添加
spring.thymeleaf.prefix=classpath:/templates/
spring.thymeleaf.suffix=.html
效果
集成Mybatis
Mybatis文档
http://www.mybatis.org/spring-boot-starter/mybatis-spring-boot-autoconfigure/
添加依赖
<dependency>
	<groupId>org.mybatis.spring.boot</groupId>
	<artifactId>mybatis-spring-boot-starter</artifactId>
	<version>1.3.1</version>
</dependency>
<dependency>
	<groupId>mysql</groupId>
	<artifactId>mysql-connector-java</artifactId>
</dependency>
<dependency>
	<groupId>com.alibaba</groupId>
	<artifactId>druid</artifactId>
	<version>1.0.5</version>
</dependency>
添加配置
mybatis有一个fetch-size属性,详情可以看这篇博客:
https://blog.csdn.net/bincavin/article/details/8727612
#mybatis
mybatis.type-aliases-package=com.imooc.miaosha.domain
mybatis.mapperLocations = classpath:com/imooc/miaosha/dao/*.xml
mybatis.configuration.map-underscore-to-camel-case=true
#datasource  mysql链接的ip:端口号/数据库名
spring.datasource.url=jdbc:mysql://10.110.3.62:3333/miaosha?useUnicode=true&characterEncoding=utf-8&allowMultiQueries=true&useSSL=false
spring.datasource.username=root
spring.datasource.password=123456
spring.datasource.driver-class-name=com.mysql.jdbc.Driver
#druid
spring.datasource.type=com.alibaba.druid.pool.DruidDataSource
spring.datasource.filters=stat
spring.datasource.maxActive=2
spring.datasource.initialSize=1
spring.datasource.maxWait=60000
spring.datasource.minIdle=1
spring.datasource.timeBetweenEvictionRunsMillis=60000
spring.datasource.minEvictableIdleTimeMillis=300000
spring.datasource.validationQuery=select 'x'
spring.datasource.testWhileIdle=true
spring.datasource.testOnBorrow=false
spring.datasource.testOnReturn=false
spring.datasource.poolPreparedStatements=true
spring.datasource.maxOpenPreparedStatements=20
#mybatis
mybatis.type-aliases-package=com.imooc.miaosha.domain
mybatis.mapperLocations = classpath:com/imooc/miaosha/dao/*.xml
mybatis.configuration.map-underscore-to-camel-case=true
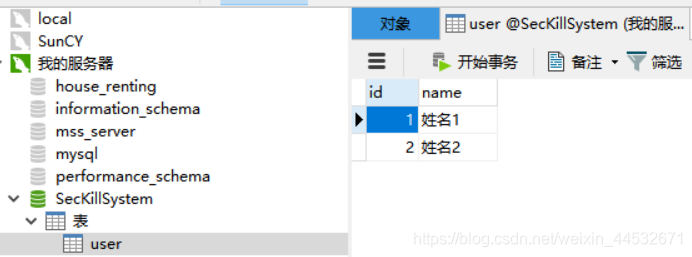
mysql数据库只有一个表
简单请求
domain层:User.java
public class User {
    private Integer id;
    private String name;

    public Integer getId() {
        return id;
    }

    public void setId(Integer id) {
        this.id = id;
    }

    public String getName() {
        return name;
    }

    public void setName(String name) {
        this.name = name;
    }

    public User(Integer id, String name) {
        this.id = id;
        this.name = name;
    }
}
dao层接口:userDao.java
@Mapper
public interface UserDao {
    @Select("select * from user where id = #{id}")
    public User getById(@Param("id") int id);
}
service层:UserService.java
@Service
public class UserService {
    @Autowired
    UserDao userDao;

    public User getById(int id){
        return userDao.getById(id);
    }
}
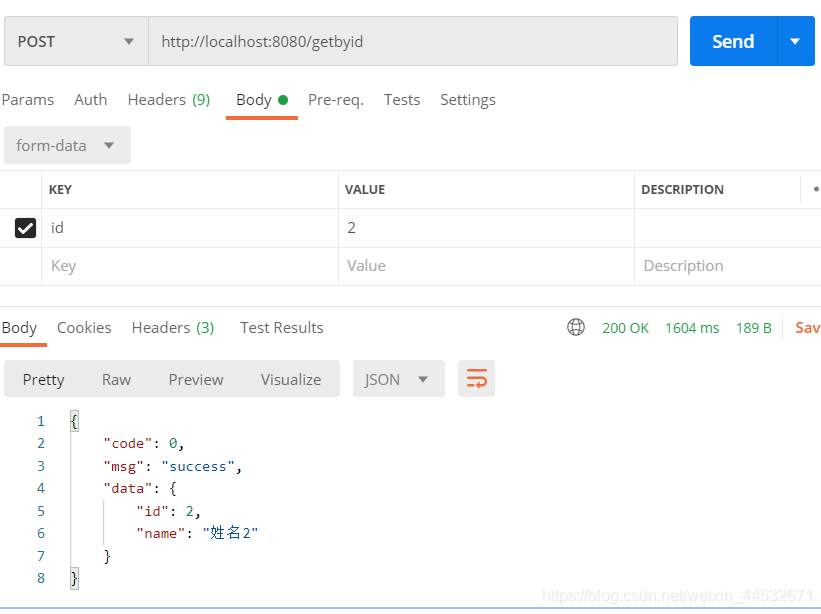
controller层 :SampleController.java
    //测试查询请求
    @RequestMapping("/getbyid")
    @ResponseBody
    public Result<User> getbyid(@RequestParam(name = "id") int i){
        User user = userService.getById(i);
        return Result.success(user);
    }
测试接口
测试事务
dao层:UserDao.java
添加
@Insert("insert into user(id,name) values(#{id},#{name})")
    public Boolean insert(User user);
service层:UserService.java
添加 @Transactional注解,表示这是个事务。
    @Transactional
    public Boolean transactionTest(){
        userDao.insert(new User(3,"用户3"));
        userDao.insert(new User(2,"用户2"));
        return true;
    }
controller层:SampleController.java
添加
 //测试事务
    @RequestMapping("/transactionTest")
    @ResponseBody
    public Result<Boolean> mytransactionTest( ){
        Boolean res = userService.transactionTest();
        return Result.success(true);
    }
测试接口
接口这里报错了,看下数据库有没有更新。
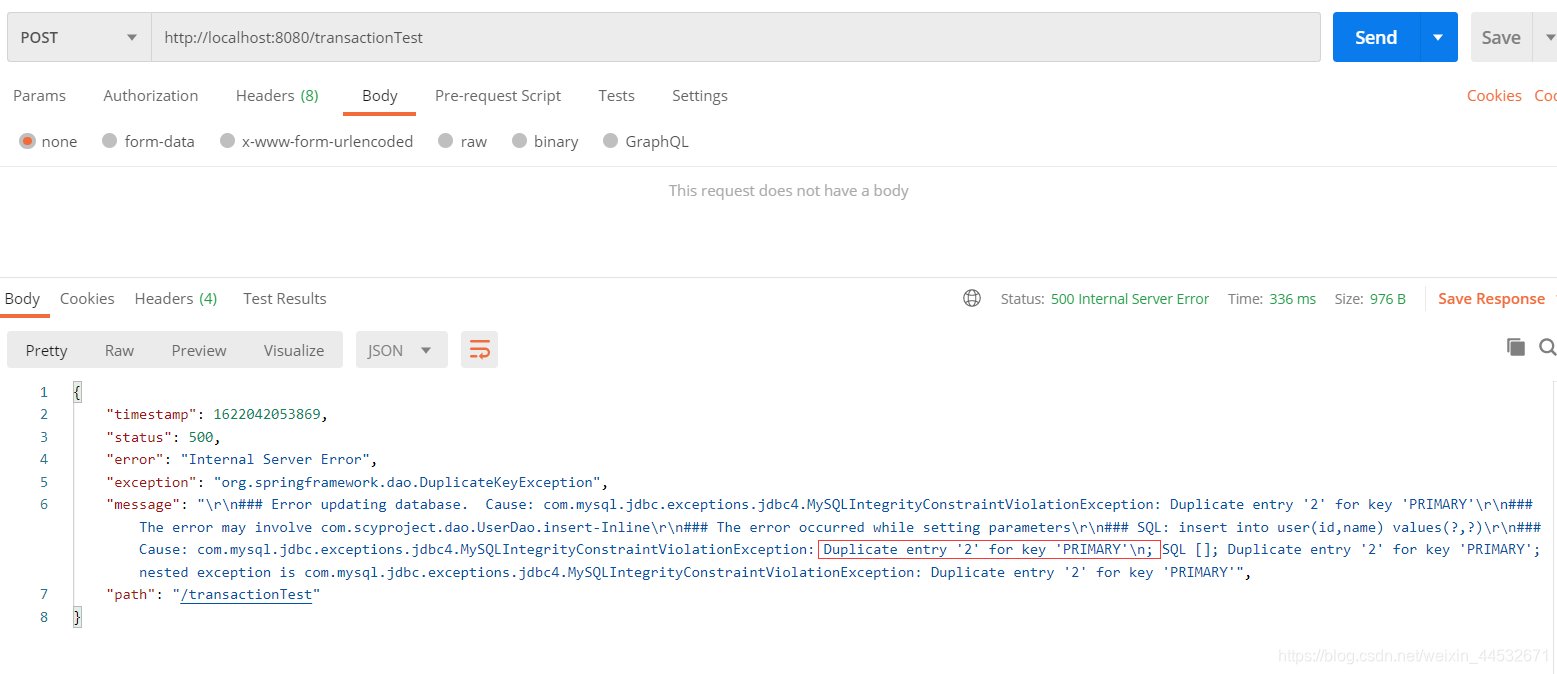
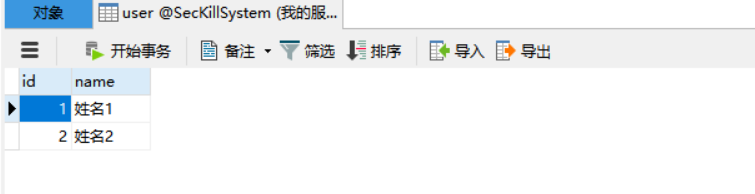
可以看到并没有新增3号用户,所以事务测试结果符合预期。
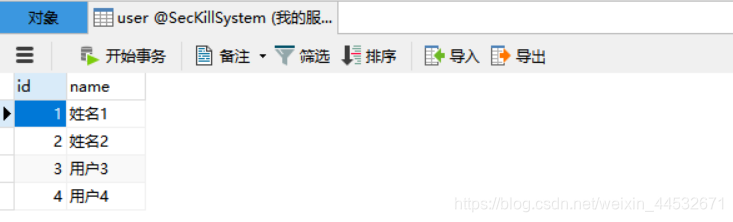
然后我把UserService.java的2号用户改为4号用户,发送同样的请求。
可以看到新的数据已经加到了数据库。
Redis的配置
之前的博客有写过安装步骤:
https://blog.csdn.net/weixin_44532671/article/details/115256901
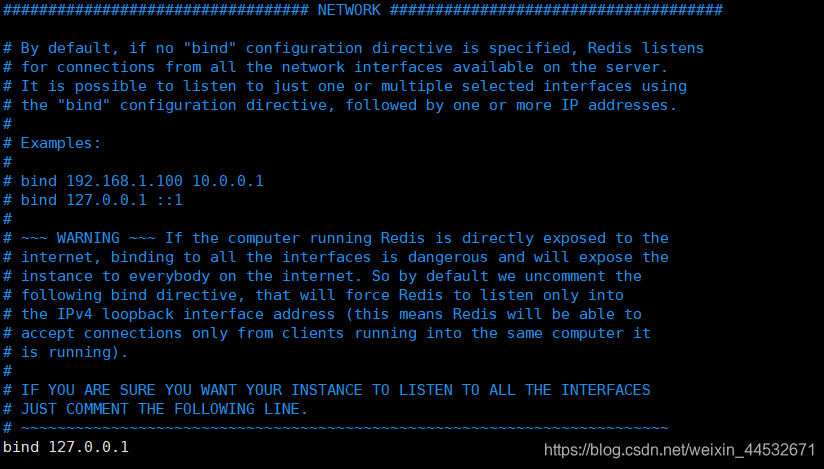
修改bin属型,bind 127.0.0.1表示只有当前主机才能访问。bind 0.0.0.0表示任何主机都可以访问。
修改允许后台执行(允许守护进程)

然后,redis-server redis.conf启动服务,redis-cli可以用get set方法

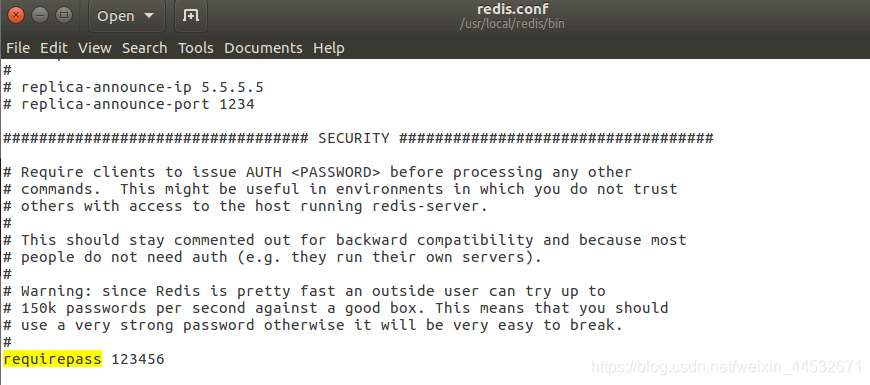
设置密码为123456(改用WinScp了,所以和上面界面不一样)
重启redis服务
redis-cli
shutdown save
exit
redis-server redis.conf
出现报错:解决方案 https://blog.csdn.net/github_33809414/article/details/82531642
然后发现登录失败

auth 123456  //登录
get hi  //测试
exit
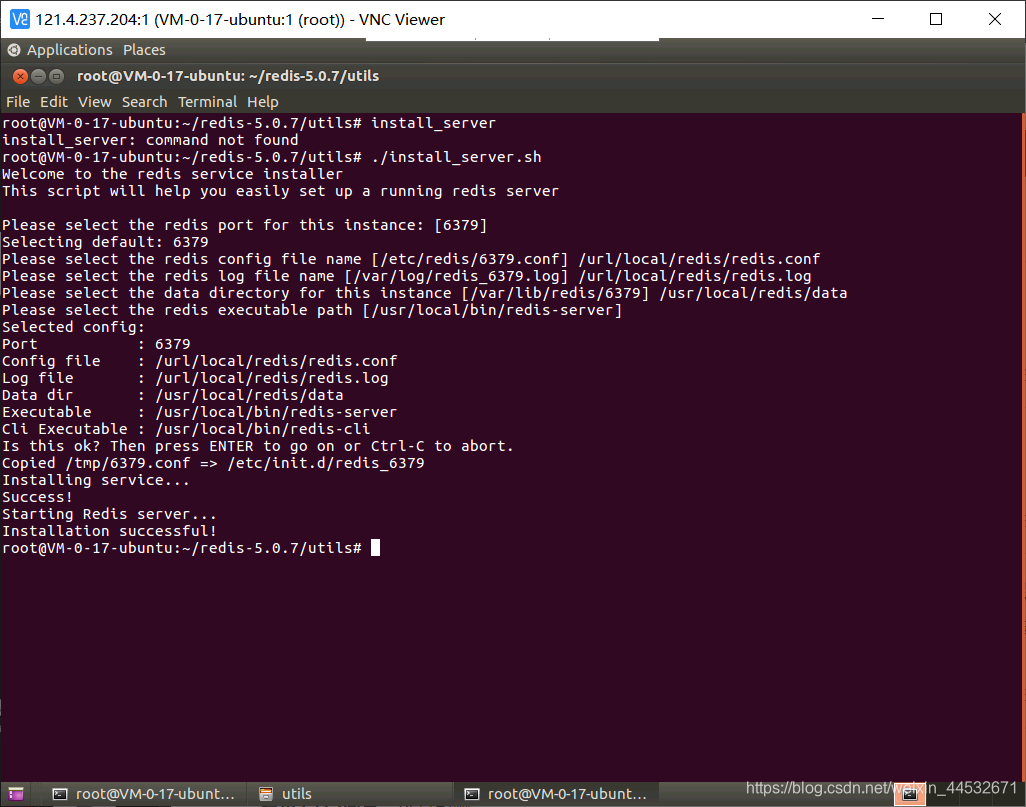
把redis注册成系统的服务
在解压目录redis5.0.7,运行install_server.sh
选择端口号6379
选择配置文件和日志文件,数据的存放位置。
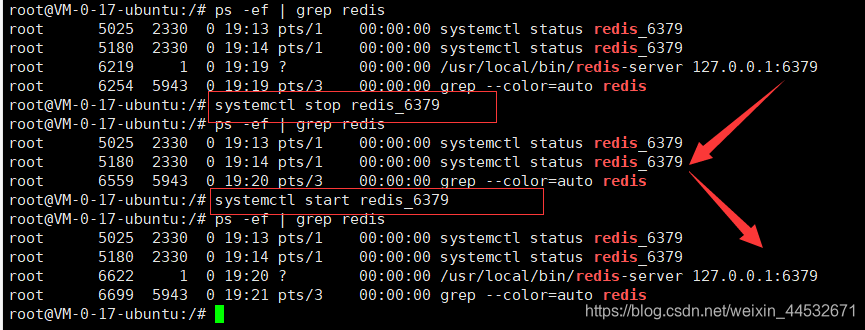
查看服务是否存在sysv-rc-conf --list I grep redis

查看状态 systemctl status redis_6379

然后可以通过stop,start开启和关闭,如果报错
var/run/redis_6379.pid exists, process is already running or crashed
先运行rm -rf /var/run/redis_6379.pid
然后就和下图一样
注册成系统服务也就是在/etc/init.d文件夹之下加了redis_6379这个文件,打开文件就可以看到
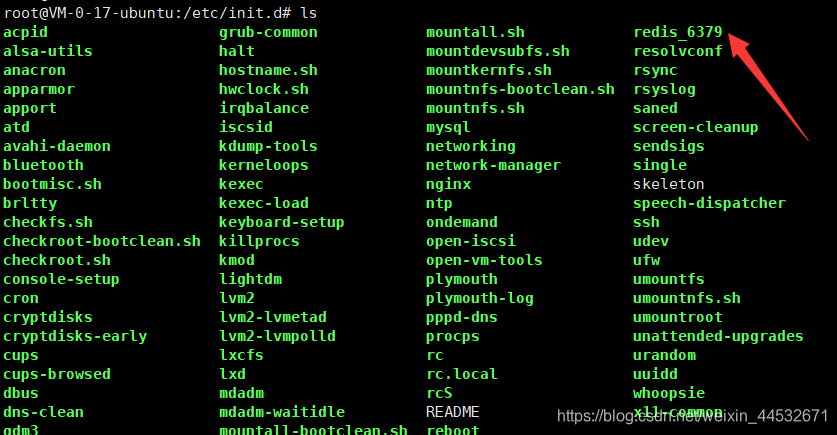
redis_6379配置文件如图:
###############
# SysV Init Information
#!/bin/sh
#Configurations injected by install_server below....

EXEC=/usr/local/bin/redis-server
CLIEXEC=/usr/local/bin/redis-cli
PIDFILE=/var/run/redis_6379.pid
CONF="/url/local/redis/redis.conf"
REDISPORT="6379"
###############
# SysV Init Information
# chkconfig: - 58 74
# description: redis_6379 is the redis daemon.
### BEGIN INIT INFO
# Provides: redis_6379
# Required-Start: $network $local_fs $remote_fs
# Required-Stop: $network $local_fs $remote_fs
# Default-Start: 2 3 4 5
# Default-Stop: 0 1 6
# Should-Start: $syslog $named
# Should-Stop: $syslog $named
# Short-Description: start and stop redis_6379
# Description: Redis daemon
### END INIT INFO


case "$1" in
    start)
        if [ -f $PIDFILE ]
        then
            echo "$PIDFILE exists, process is already running or crashed"
        else
            echo "Starting Redis server..."
            $EXEC $CONF
        fi
        ;;
    stop)
        if [ ! -f $PIDFILE ]
        then
            echo "$PIDFILE does not exist, process is not running"
        else
            PID=$(cat $PIDFILE)
            echo "Stopping ..."
            $CLIEXEC -p $REDISPORT shutdown
            while [ -x /proc/${PID} ]
            do
                echo "Waiting for Redis to shutdown ..."
                sleep 1
            done
            echo "Redis stopped"
        fi
        ;;
    status)
        PID=$(cat $PIDFILE)
        if [ ! -x /proc/${PID} ]
        then
            echo 'Redis is not running'
        else
            echo "Redis is running ($PID)"
        fi
        ;;
    restart)
        $0 stop
        $0 start
        ;;
    *)
        echo "Please use start, stop, restart or status as first argument"
        ;;
esac
springboot 集成 redis,Jedis
添加依赖,配置
pom文件中添加
<dependency>
    <groupId>redis.clients</groupId>
    <artifactId>jedis</artifactId>
</dependency>
<dependency>
    <groupId>com.alibaba</groupId>
    <artifactId>fastjson</artifactId>
    <version>1.2.38</version>
</dependency>
application.properties文件添加
#redis
redis.host=10.110.3.62
redis.port=6379
redis.timeout=3
redis.password=123456
redis.poolMaxTotal=10
redis.poolMaxIdle=10
redis.poolMaxWait=3
封装Jedis
定义RedisConfig类,读取properties文件参数。
@Component
@ConfigurationProperties(prefix = "redis")  //讲properties中的配置
public class RedisConfig {
    private String host;
    private int port;
    private int timeout;
    private String password;
    private int poolMaxTotal;
    private int poolMaxIdle;
    private int poolMaxWait;
 	//(get,set方法省略)
 }
定义JedisPool类,Jedis连接池。
@Service
public class RedisPoolFactory {
    @Autowired
    RedisConfig redisConfig;
    @Bean
    public JedisPool JedisPoolFactory(){
        JedisPoolConfig poolConfig = new JedisPoolConfig();
        poolConfig.setMaxIdle(redisConfig.getPoolMaxIdle());
        poolConfig.setMaxTotal(redisConfig.getPoolMaxTotal());
        poolConfig.setMaxWaitMillis(redisConfig.getPoolMaxWait());
        JedisPool jedisPool = new JedisPool(
                poolConfig,
                redisConfig.getHost(),
                redisConfig.getPort(),
                redisConfig.getTimeout()*1000,
                redisConfig.getPassword(),
                0
        );
        return jedisPool;
    }
}
KeyPrefix接口,定义 getExpireSeconds,getPrefix方法。
public interface KeyPrefix{
	public int getExpireSeconds();
	public String getPrefix();
}
BasePrefix抽象类,实现KeyPrefix接口。
abstract class BasePrefix implements KeyPrefix{
	public String prefix;
	public int expireSeconds;
	//(构造函数省略)
	public int getExpireSeconds(){
		return expireSeconds;
	}
	public String getPrefix(){
		return this.getClass().getSimpleName()+":"+prefix;
	}
}
UserKey类继承BasePrefix抽象类,里面定义了static成员变量,方便调用 。
class UserKey extends BasePrefix{
	//(构造函数省略)
	static UserKey getById =new UserKey("id",30);
	static UserKey getByName =new UserKey("name",30);
}
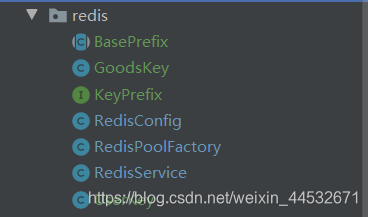
RedisService类,对Jedis进行封装。
@Service
public class RedisService {

    @Autowired
    JedisPool jedisPool;

    /**
     * 获取当个对象
     * */
    public <T> T get(KeyPrefix prefix, String key,  Class<T> clazz) {
        Jedis jedis = null;
        try {
            jedis =  jedisPool.getResource();
            //生成真正的key
            String realKey  = prefix.getPrefix() + key;
            String  str = jedis.get(realKey);
            T t =  stringToBean(str, clazz);
            return t;
        }finally {
            returnToPool(jedis);
        }
    }
    /**
     * 设置对象
     * */
    public <T> boolean set(KeyPrefix prefix, String key,  T value) {
        Jedis jedis = null;
        try {
            jedis =  jedisPool.getResource();
            String str = beanToString(value);
            if(str == null || str.length() <= 0) {
                return false;
            }
            String realKey  = prefix.getPrefix() + key;
            int seconds =  prefix.getExpireSeconds();
            if(seconds <= 0) {
                jedis.set(realKey, str);
            }else {
                //设置过期时间
                jedis.setex(realKey, seconds, str);
            }
            return true;
        }finally {
            returnToPool(jedis);
        }
    }

    public <T> boolean setNXEX(final KeyPrefix prefix, final String key, final T req) { //只在键不存在时才操作,然后过期时间是秒。
        if(req == null){
            return false;
        }
        int expireSeconds = prefix.getExpireSeconds();
        if(expireSeconds <= 0) {
            throw new RuntimeException("[SET EX NX]必须设置超时时间");
        }
        String realKey = prefix.getPrefix() + key;
        String value = beanToString(req);
        Jedis jc = null;
        try {
            jc = jedisPool.getResource();
            String ret =  jc.set(realKey, value, "nx", "ex", expireSeconds);
            return "OK".equals(ret);
        } catch (final Exception e) {
            e.printStackTrace();
            return false;
        } finally {
            returnToPool(jc);
        }
    }

    /**
     * 判断key是否存在
     * */
    public <T> boolean exists(KeyPrefix prefix, String key) {
        Jedis jedis = null;
        try {
            jedis =  jedisPool.getResource();
            //生成真正的key
            String realKey  = prefix.getPrefix() + key;
            return  jedis.exists(realKey);
        }finally {
            returnToPool(jedis);
        }
    }

    /**
     * 删除
     * */
    public boolean delete(KeyPrefix prefix, String key) {
        Jedis jedis = null;
        try {
            jedis =  jedisPool.getResource();
            //生成真正的key
            String realKey  = prefix.getPrefix() + key;
            long ret =  jedis.del(realKey);
            return ret > 0;
        }finally {
            returnToPool(jedis);
        }
    }

    /**
     * 增加值
     * */
    public <T> Long incr(KeyPrefix prefix, String key) {
        Jedis jedis = null;
        try {
            jedis =  jedisPool.getResource();
            //生成真正的key
            String realKey  = prefix.getPrefix() + key;
            return  jedis.incr(realKey);
        }finally {
            returnToPool(jedis);
        }
    }

    /**
     * 减少值
     * */
    public <T> Long decr(KeyPrefix prefix, String key) {
        Jedis jedis = null;
        try {
            jedis =  jedisPool.getResource();
            //生成真正的key
            String realKey  = prefix.getPrefix() + key;
            return  jedis.decr(realKey);
        }finally {
            returnToPool(jedis);
        }
    }

    public boolean delete(KeyPrefix prefix) {
        if(prefix == null) {
            return false;
        }
        List<String> keys = scanKeys(prefix.getPrefix());
        if(keys==null || keys.size() <= 0) {
            return true;
        }
        Jedis jedis = null;
        try {
            jedis = jedisPool.getResource();
            jedis.del(keys.toArray(new String[0]));
            return true;
        } catch (final Exception e) {
            e.printStackTrace();
            return false;
        } finally {
            if(jedis != null) {
                jedis.close();
            }
        }
    }

    public List<String> scanKeys(String key) {
        Jedis jedis = null;
        try {
            jedis = jedisPool.getResource();
            List<String> keys = new ArrayList<String>();
            String cursor = "0";
            ScanParams sp = new ScanParams();
            sp.match("*"+key+"*");
            sp.count(100);
            do{
                ScanResult<String> ret = jedis.scan(cursor, sp);
                List<String> result = ret.getResult();
                if(result!=null && result.size() > 0){
                    keys.addAll(result);
                }
                //再处理cursor
                cursor = ret.getStringCursor();
            }while(!cursor.equals("0"));
            return keys;
        } finally {
            if (jedis != null) {
                jedis.close();
            }
        }
    }

    public static <T> String beanToString(T value) {
        if(value == null) {
            return null;
        }
        Class<?> clazz = value.getClass();
        if(clazz == int.class || clazz == Integer.class) {
            return ""+value;
        }else if(clazz == String.class) {
            return (String)value;
        }else if(clazz == long.class || clazz == Long.class) {
            return ""+value;
        }else {
            return JSON.toJSONString(value);
        }
    }

    @SuppressWarnings("unchecked")
    public static <T> T stringToBean(String str, Class<T> clazz) {
        if(str == null || str.length() <= 0 || clazz == null) {
            return null;
        }
        if(clazz == int.class || clazz == Integer.class) {
            return (T)Integer.valueOf(str);
        }else if(clazz == String.class) {
            return (T)str;
        }else if(clazz == long.class || clazz == Long.class) {
            return  (T)Long.valueOf(str);
        }else {
            return JSON.toJavaObject(JSON.parseObject(str), clazz);
        }
    }

    private void returnToPool(Jedis jedis) {
        if(jedis != null) {
            jedis.close();
        }
    }

}
调用
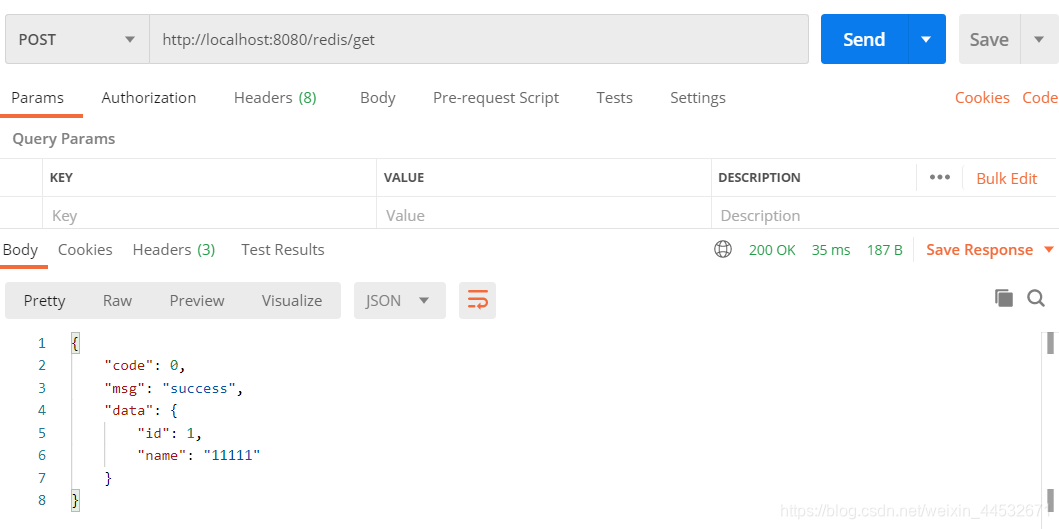
@RequestMapping("/redis/get")
@ResponseBody
public Result<User> redisGet() {
User user = redisService.get(UserKey.getById, ""+1, User.class);
return Result.success(user);
}
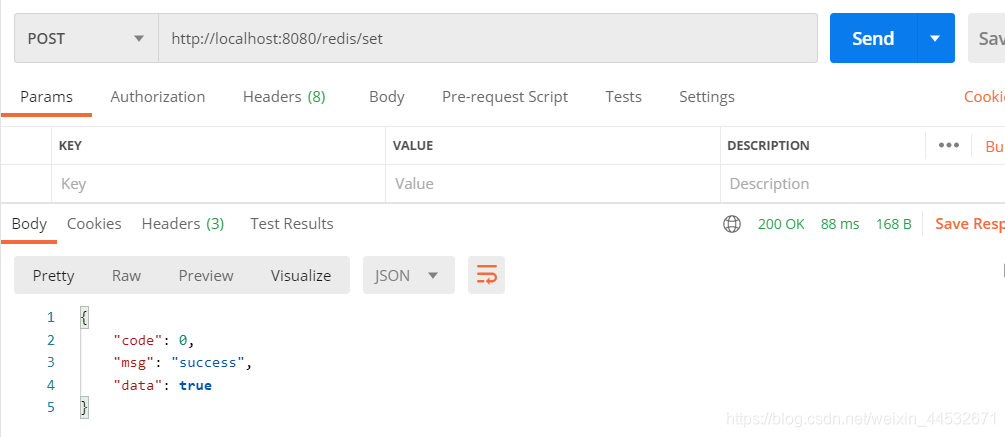
@RequestMapping("/redis/set")
@ResponseBody
public Result<Boolean> redisSet() {
User user = new User();
user.setId(1);
user.setName("11111");
redisService.set(UserKey.getById, ""+1, user);//UserKey:id1
return Result.success(true);
}
请求测试
Fastjson依赖
序列化用Fastjson,明文可读,效率是ProtocolBuffer的一半。
最快的是Protocol Buffer,但是序列化后不可读。
原文链接:https://blog.csdn.net/weixin_44532671/article/details/117259410
所属网站分类: 技术文章 > 博客
作者:我是个大美女
链接:http://www.javaheidong.com/blog/article/208023/916c1011724941df2c48/
来源:java黑洞网
任何形式的转载都请注明出处,如有侵权 一经发现 必将追究其法律责任
昵称:
评论内容:(最多支持255个字符)
---无人问津也好,技不如人也罢,你都要试着安静下来,去做自己该做的事,而不是让内心的烦躁、焦虑,坏掉你本来就不多的热情和定力