

[超详细]搭建SpringBoot+Vue 前后端分离-后端
发布于2021-05-29 22:24 阅读(988) 评论(0) 点赞(25) 收藏(5)
项目已放至Github,路径:https://github.com/Oxygen404/Springbootdemo
前端搭建教程博客:https://blog.csdn.net/m0_46193982/article/details/117329606
1.创建数据库
sql文件
CREATE DATABASE `mydatabase` ;

USE `mydatabase`;

DROP TABLE IF EXISTS `user`;
CREATE TABLE `user`  (
  `id` int(11) NOT NULL AUTO_INCREMENT COMMENT '唯一主键',
  `nickname` varchar(255) CHARACTER SET utf8 COLLATE utf8_general_ci NULL DEFAULT NULL COMMENT '昵称',
  `username` varchar(255) CHARACTER SET utf8 COLLATE utf8_general_ci NOT NULL COMMENT '用户名',
  `password` varchar(255) CHARACTER SET utf8 COLLATE utf8_general_ci NOT NULL COMMENT '密码',
  `createtime` datetime(0) NULL DEFAULT NULL COMMENT '创建时间',
  `updatetime` datetime(0) NULL DEFAULT NULL COMMENT '更新时间',
  PRIMARY KEY (`id`) USING BTREE
) ENGINE = InnoDB CHARACTER SET = utf8 COLLATE = utf8_general_ci ROW_FORMAT = Dynamic;

SET FOREIGN_KEY_CHECKS = 1;
2.创建Springboot项目
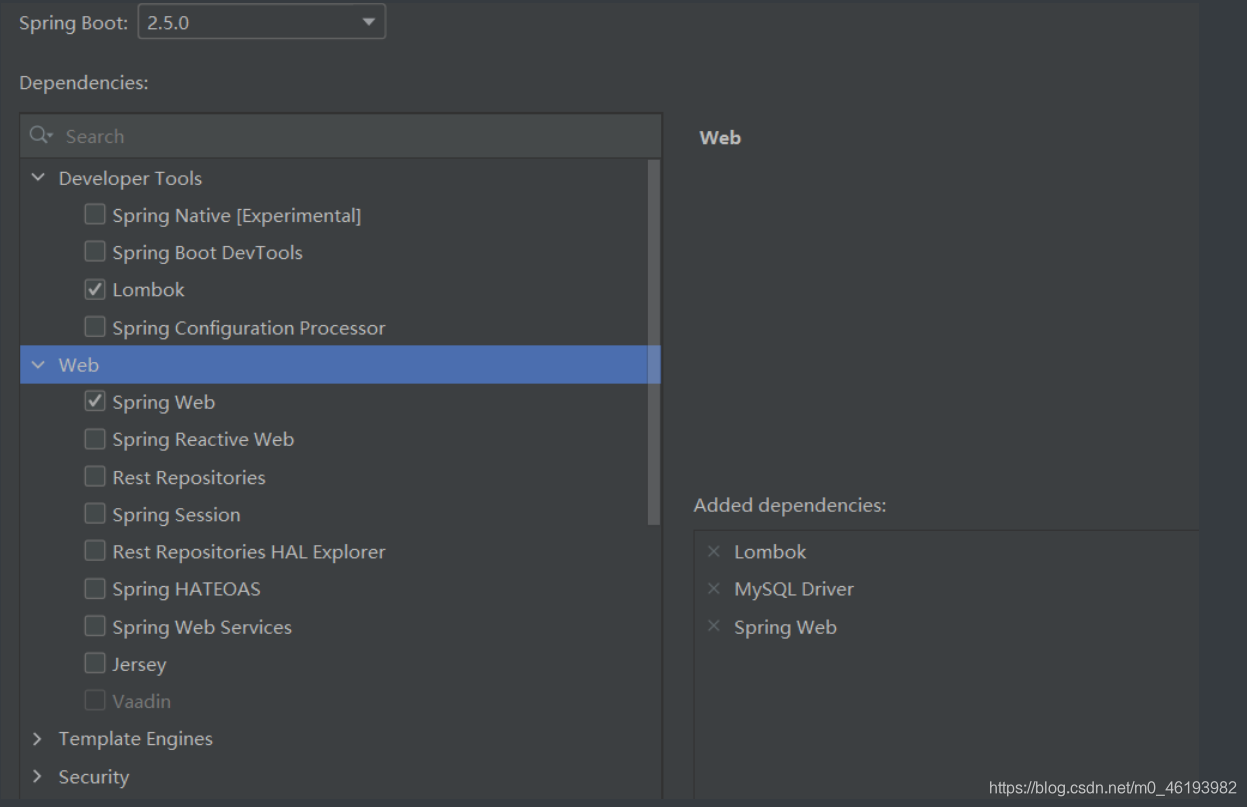
使用IDEA的Springboot initializer,选择几个要用到的依赖Lombok、Mysql Driver、Spring boot
3.使用mybatisplus的代码生成器
导入相关依赖
<!--代码生成器依赖-->
<dependency>
    <groupId>org.apache.velocity</groupId>
    <artifactId>velocity-engine-core</artifactId>
    <version>2.3</version>
</dependency>

<dependency>
    <groupId>com.baomidou</groupId>
    <artifactId>mybatis-plus-generator</artifactId>
    <version>3.3.2</version>
    <scope>test</scope>
</dependency>
<!--mybatisplus依赖-->
<dependency>
    <groupId>com.baomidou</groupId>
    <artifactId>mybatis-plus-boot-starter</artifactId>
    <version>3.3.2</version>
</dependency>
然后在test下创建Codegenerator
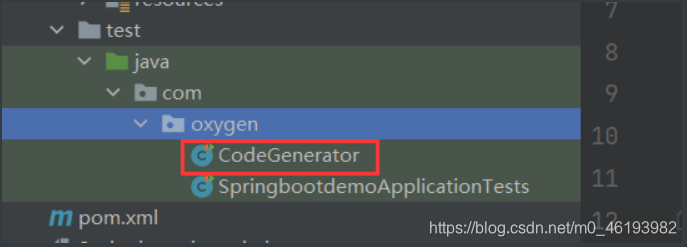
Codegenerator的代码有详细的注解,可以根据自己的需求进行修改。在46行的样子要修改自己的数据库账号和密码,我写了注释
package com.oxygen;

import com.baomidou.mybatisplus.annotation.DbType;
import com.baomidou.mybatisplus.annotation.IdType;
import com.baomidou.mybatisplus.generator.AutoGenerator;
import com.baomidou.mybatisplus.generator.config.DataSourceConfig;
import com.baomidou.mybatisplus.generator.config.GlobalConfig;
import com.baomidou.mybatisplus.generator.config.PackageConfig;
import com.baomidou.mybatisplus.generator.config.StrategyConfig;
import com.baomidou.mybatisplus.generator.config.rules.DateType;
import com.baomidou.mybatisplus.generator.config.rules.NamingStrategy;
import org.junit.jupiter.api.Test;

public class CodeGenerator {

    @Test
    public void run() {

        // 1、创建代码生成器
        AutoGenerator mpg = new AutoGenerator();


        // 2、全局配置
        GlobalConfig gc = new GlobalConfig();
        String projectPath = System.getProperty("user.dir");
        // 此处建议写项目/src/main/java源代码的绝对路径
        gc.setOutputDir(projectPath + "/src/main/java");
        // 生成注释时的作者
        gc.setAuthor("oxygen");
        //生成后是否打开资源管理器
        gc.setOpen(false);
        gc.setFileOverride(false); //重新生成时文件是否覆盖
        gc.setServiceName("%sService");	//去掉Service接口的首字母I
        gc.setIdType(IdType.ID_WORKER_STR); //主键策略
        gc.setDateType(DateType.ONLY_DATE); //定义生成的实体类中日期类型
        // 如果开启Swagger,要引入相应的包
        // gc.setSwagger2(true); //开启Swagger2模式

        mpg.setGlobalConfig(gc);

        // 3、数据源配置
        DataSourceConfig dsc = new DataSourceConfig();
        dsc.setUrl("jdbc:mysql://localhost:3306/mydatabase?useSSL=false&useUnicode=true&characterEncoding=utf-8&serverTimezone=GMT%2B8");
        dsc.setDriverName("com.mysql.cj.jdbc.Driver");
        //这里的username和password自行修改为自己的数据库的账号密码
        dsc.setUsername("root");
        dsc.setPassword("123456");
        dsc.setDbType(DbType.MYSQL);
        mpg.setDataSource(dsc);

        // 4、包配置
        PackageConfig pc = new PackageConfig();
        // 此处要注意:parent + moduleName 为包的名字,在这个包下,创建对应的controller...
        pc.setParent("com.oxygen");
        pc.setModuleName(null); //模块名

        pc.setController("controller");
        pc.setEntity("entity");
        pc.setService("service");
        pc.setMapper("mapper");
        mpg.setPackageInfo(pc);

        // 5、策略配置
        StrategyConfig strategy = new StrategyConfig();
        // 数据库中表的名字,表示要对哪些表进行自动生成controller service、mapper...
        strategy.setInclude("user");
        // 数据库表映射到实体的命名策略,驼峰命名法
        strategy.setNaming(NamingStrategy.underline_to_camel);
        // 生成实体时去掉表前缀,比如edu_course,如果不加下面这句,生成的实体类名字就是:EduCourse
        strategy.setTablePrefix("edu_");
        //生成实体时去掉表前缀
        // strategy.setTablePrefix(pc.getModuleName() + "_");

        //数据库表字段映射到实体的命名策略
        strategy.setColumnNaming(NamingStrategy.underline_to_camel);
        strategy.setEntityLombokModel(true); // lombok 模型 @Accessors(chain = true) setter链式操作

        strategy.setRestControllerStyle(true); //restful api风格控制器
        strategy.setControllerMappingHyphenStyle(true); //url中驼峰转连字符

        mpg.setStrategy(strategy);


        // 6、执行
        mpg.execute();
    }
}
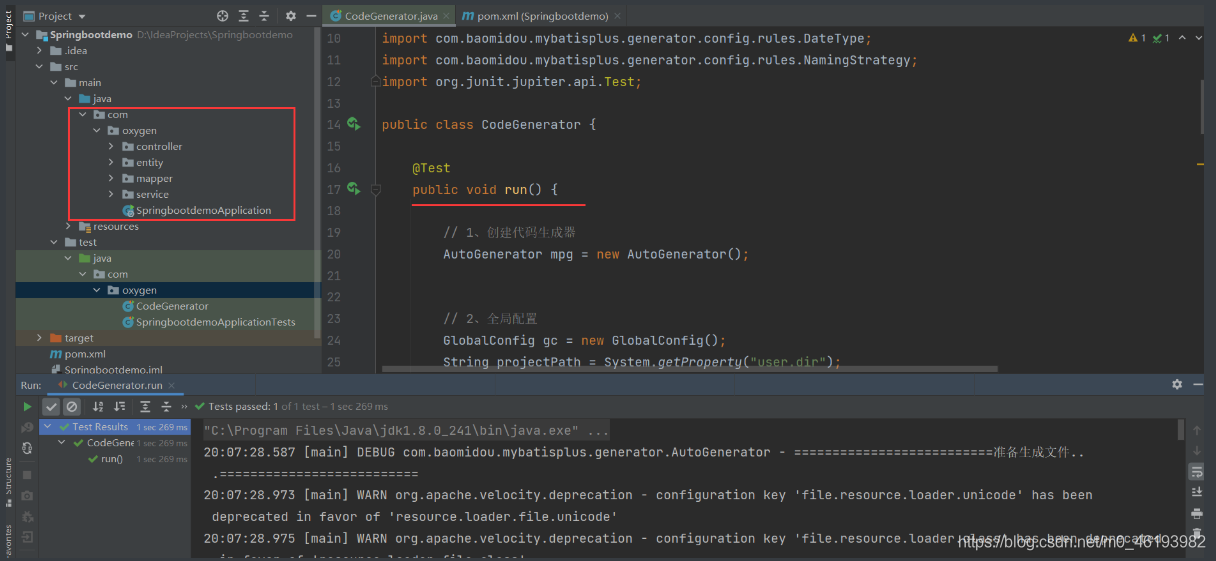
然后运行CodeGenerator,生成后的的包框架如下图所示
4.测试数据库连接
测试之前先写配置文件application.properties,我使用的是yaml格式所以改为application.yml
server:
  port: 8888

spring:
  datasource:
    url: jdbc:mysql://localhost:3306/mydatabase?useSSL=false&useUnicode=true&characterEncoding=utf-8&serverTimezone=GMT%2B8
    driver-class-name: com.mysql.cj.jdbc.Driver
    username: root
    password: root
然后再启动类上添加@MapperScan注解
package com.oxygen;

import org.mybatis.spring.annotation.MapperScan;
import org.springframework.boot.SpringApplication;
import org.springframework.boot.autoconfigure.SpringBootApplication;

@SpringBootApplication
@MapperScan("com.oxygen.mapper")
public class SpringbootdemoApplication {

    public static void main(String[] args) {
        SpringApplication.run(SpringbootdemoApplication.class, args);
    }

}
这里为了测试方便所以往数据库里面先随便插入一条数据
INSERT INTO `user` VALUES (1, 'Oxygen', '123456', '123456', '2021-05-24 20:19:44', '2021-05-24 20:19:54');
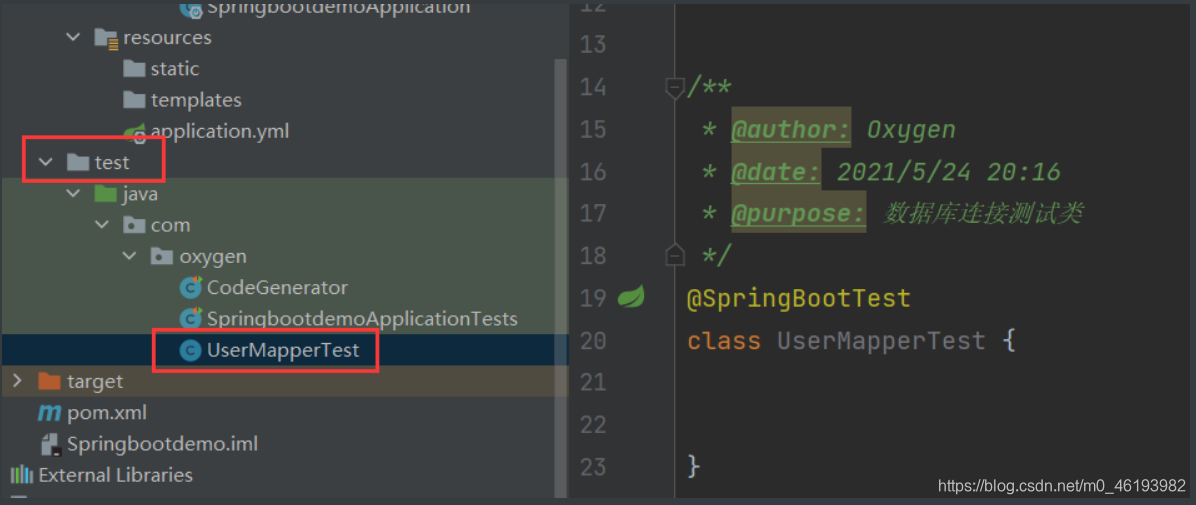
再Test下创建测试类UserMapperTest
package com.oxygen;
import com.oxygen.entity.User;
import com.oxygen.service.UserService;
import org.junit.jupiter.api.Test;
import org.springframework.boot.test.context.SpringBootTest;
import javax.annotation.Resource;
import java.util.List;
/**
* @author: Oxygen
* @date: 2021/5/24 20:16
* @purpose: 数据库连接测试类
*/
@SpringBootTest
class UserMapperTest {
@Resource
UserService userService;
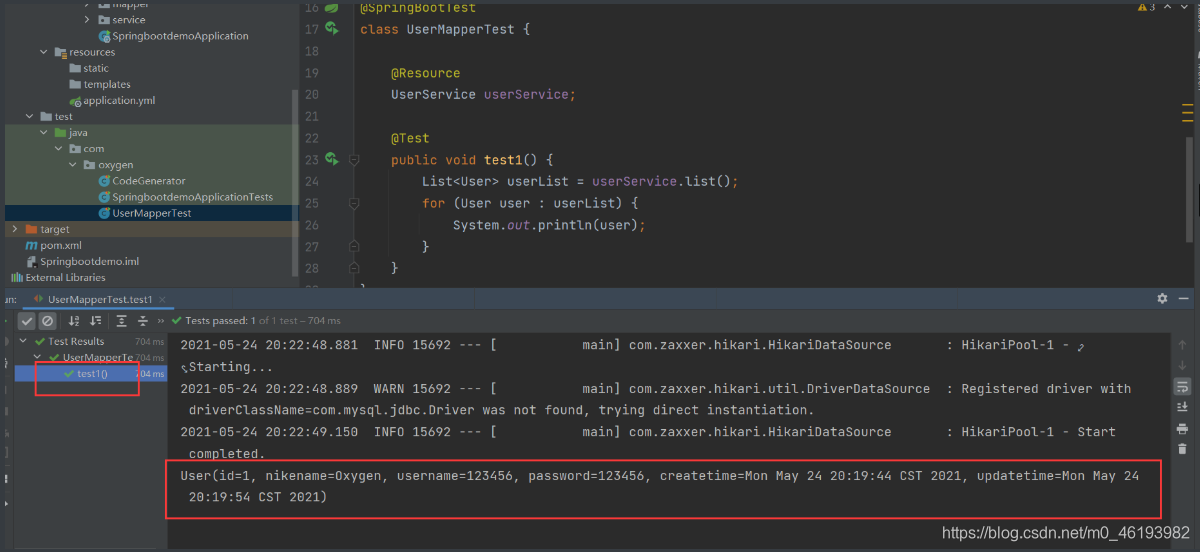
@Test
public void test1() {
List<User> userList = userService.list();
for (User user : userList) {
System.out.println(user);
}
}
}
右键运行Test1测试方法,运行结果如下图,查询出了刚刚插入的用户
5.使用mybatisplus自动填充
数据库的用户表中有两个字段createtime 和 updatetime,也就是这一条数据的创建时间和更新时间,mybatisplus提供了自动填充的方法
再User类上的createtime和updatetime上添加注解
/**
 * 创建时间
 */
@TableField(fill = FieldFill.INSERT)
private Date createtime;

/**
 * 更新时间
 */
@TableField(fill = FieldFill. INSERT_UPDATE)
private Date updatetime;
完整的User类如下
package com.oxygen.entity;

import com.baomidou.mybatisplus.annotation.FieldFill;
import com.baomidou.mybatisplus.annotation.IdType;
import java.util.Date;

import com.baomidou.mybatisplus.annotation.TableField;
import com.baomidou.mybatisplus.annotation.TableId;
import java.io.Serializable;
import lombok.Data;
import lombok.EqualsAndHashCode;

/**
 * <p>
 *
 * </p>
 *
 * @author oxygen
 * @since 2021-05-24
 */
@Data
@EqualsAndHashCode(callSuper = false)
public class User implements Serializable {

    private static final long serialVersionUID=1L;

    /**
     * 唯一主键
     */
    @TableId(value = "id", type = IdType.AUTO)
    private Integer id;

    /**
     * 昵称
     */
    private String nickname;

    /**
     * 用户名
     */
    private String username;

    /**
     * 密码
     */
    private String password;

    /**
     * 创建时间
     */
    @TableField(fill = FieldFill.INSERT)
    private Date createtime;

    /**
     * 更新时间
     */
    @TableField(fill = FieldFill. INSERT_UPDATE)
    private Date updatetime;


}
新建一个hander包,再hander包下新建MyMataObjectHandler类,自定义实现类

package com.oxygen.hander;

import com.baomidou.mybatisplus.core.handlers.MetaObjectHandler;
import lombok.extern.slf4j.Slf4j;
import org.apache.ibatis.reflection.MetaObject;
import org.springframework.stereotype.Component;

import java.util.Date;

/**
 * @purpose: 自动填充时间
 */
@Slf4j
@Component //把处理器添加到IOC容器中
public class MyMataObjectHandler implements MetaObjectHandler {
    @Override
    public void insertFill(MetaObject metaObject) {
        //设置每次插入的时候更新 创建时间和更新时间 也就是初始化时间
        this.setFieldValByName("createtime",new Date(),metaObject);
        this.setFieldValByName("updatetime",new Date(),metaObject);

    }

    @Override
    public void updateFill(MetaObject metaObject) {
        this.setFieldValByName("updateTime",new Date(),metaObject);
    }
}
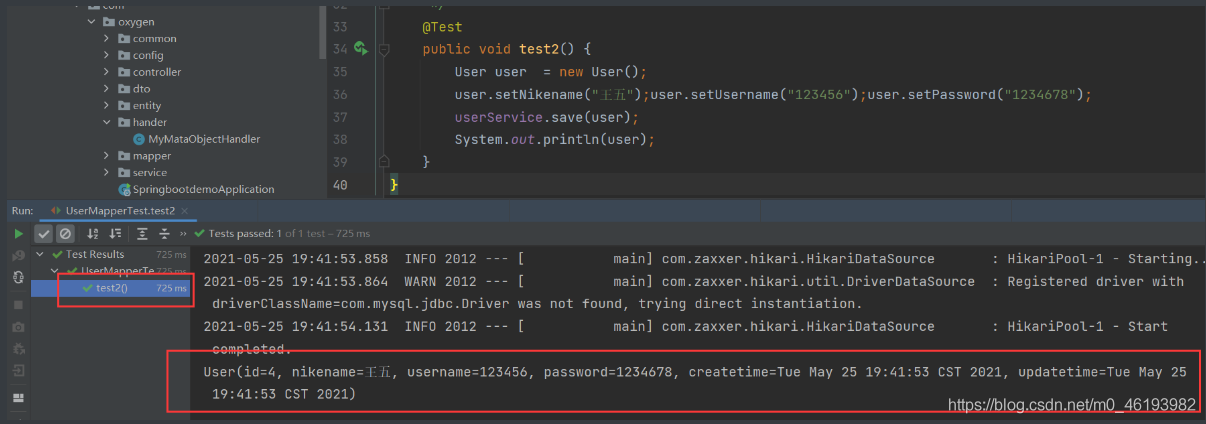
写一个测试新增用户的方法,测试一下自动填充功能,直接再UserMapperTest中新增一个Test2方法,代码如下
/**
 * 测试增加数据
 */
@Test
public void test2() {
    User user  = new User();
    user.setNickname("王五");user.setUsername("123456");user.setPassword("1234678");
    userService.save(user);
    System.out.println(user);
}
测试的结果如下,id是自增主键,createtime和updatetime是自动填充的,这里通过userService.save之后会把新的数据回写到user中,所以打印的结果中就出现了完整的id和createtime和updatetime
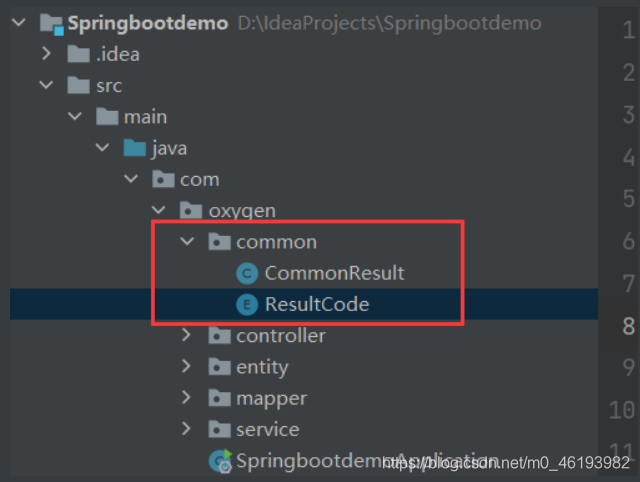
6.封装结果集
创建common包,再common包下创建ResultCode 和 CommonResult 两个类
package com.oxygen.common;

import lombok.Getter;

@Getter
public enum ResultCode {

    NOHANDLER(404,"请求地址错误"),
    SUCCESS(200,"操作成功"),
    FAILED(500,"操作失败"),
    NOTOKEN(401,"未登录或登录已超时"),
    NOPERMISS(403,"无操作权限"),
    ;
    private Integer code;
    private String message;

    ResultCode(Integer code, String message) {
        this.code = code;
        this.message = message;
    }
}
package com.oxygen.common;

import lombok.Getter;


@Getter
public class CommonResult {
    private Integer code;
    private String message;
    private Object obj;

    private CommonResult(Integer code, String message, Object obj) {
        this.code = code;
        this.message = message;
        this.obj = obj;
    }

    public static CommonResult nohandler() {
        return new CommonResult(ResultCode.NOHANDLER.getCode(), ResultCode.NOHANDLER.getMessage(),null);
    }
    public static CommonResult success(Object data) {
        return new CommonResult(ResultCode.SUCCESS.getCode(), ResultCode.SUCCESS.getMessage(),data);
    }
    public static CommonResult failed() {
        return new CommonResult(ResultCode.FAILED.getCode(), ResultCode.FAILED.getMessage(),null);
    }
    public static CommonResult failed(String message) {
        return new CommonResult(ResultCode.FAILED.getCode(),message,null);
    }
    public static CommonResult notoken() {
        return new CommonResult(ResultCode.NOTOKEN.getCode(), ResultCode.NOTOKEN.getMessage(),null);
    }
    public static CommonResult nopremiss() {
        return new CommonResult(ResultCode.NOPERMISS.getCode(), ResultCode.NOPERMISS.getMessage(),null);
    }
}
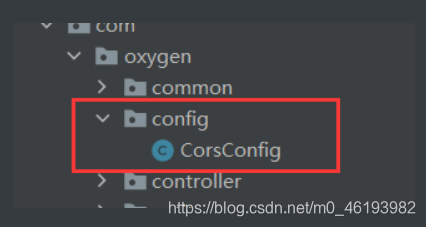
7.处理跨域问题
新建一个包config,再config下面建立CorsConfig类
import org.springframework.context.annotation.Bean;
import org.springframework.context.annotation.Configuration;
import org.springframework.http.HttpHeaders;
import org.springframework.web.servlet.config.annotation.CorsRegistry;

import org.springframework.web.servlet.config.annotation.WebMvcConfigurer;

@Configuration
public class CorsConfig implements WebMvcConfigurer {

    @Bean
    public WebMvcConfigurer corsConfigurer()
    {
        return new WebMvcConfigurer() {
            @Override
            public void addCorsMappings(CorsRegistry registry) {
                registry.addMapping("/**").
                        allowedOriginPatterns("*"). //允许跨域的域名,可以用*表示允许任何域名使用
                        allowedMethods("*"). //允许任何方法(post、get等)
                        allowedHeaders("*"). //允许任何请求头
                        allowCredentials(true). //带上cookie信息
                        exposedHeaders(HttpHeaders.SET_COOKIE).maxAge(3600L); //maxAge(3600)表明在3600秒内,不需要再发送预检验请求,可以缓存该结果
            }
        };
    }
}
8. MD5加密工具类
为了避免密码以明文的形式在网络上传输,写一个加密的工具类,同时数据库中也存储加密后的密码。
创建一个util包,在util包下新建一个MD5Utils类
package com.oxygen.util;

import java.security.MessageDigest;
import java.security.NoSuchAlgorithmException;

/**
 * @purpose: MD5加密工具类
 */
public class MD5Utils {

    /**
    * MD5加密类
    @param str 要加密的字符串
    @return    加密后的字符串
    */
    public static String code(String str){
        try {
            MessageDigest md = MessageDigest.getInstance("MD5");
            md.update(str. getBytes());
            byte[]byteDigest = md.digest();
            int i;
            StringBuffer buf = new StringBuffer("");
            for (int offset = 0; offset < byteDigest.length; offset++) {
                i = byteDigest [offset];
                if(i<0)
                    i += 256;
                if(i<16)
                    buf.append("'");
                buf.append(Integer.toHexString(i));
            }
            //32位加密
            return buf. toString();
            //16位的加密
            //return buf. toString().substring(8, 24);
        } catch (NoSuchAlgorithmException e) {
            e.printStackTrace();
            return null;
        }
    }
}
9.完善后端代码
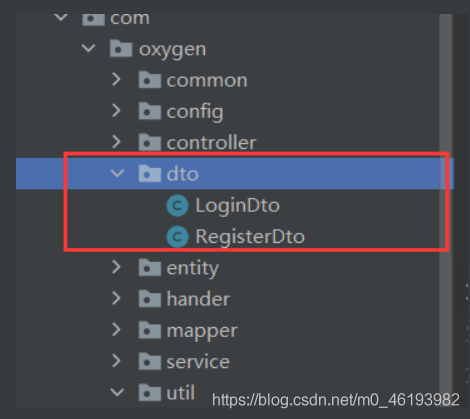
dto对象(新建包dto,然后创建两个类LoginDto和RegisterDto)
package com.oxygen.dto;

import lombok.Data;
import lombok.ToString;

@Data
@ToString
public class LoginDto {

    private String username;
    private String password;
}
package com.oxygen.dto;


import lombok.Data;
import lombok.ToString;

@Data
@ToString
public class RegisterDto {

    private String nickname;
    private String username;
    private String password;
    private String secondPassword;
}
Usercontroller
package com.oxygen.controller;


import com.oxygen.common.CommonResult;
import com.oxygen.dto.LoginDto;
import com.oxygen.dto.RegisterDto;
import com.oxygen.entity.User;
import com.oxygen.service.UserService;
import lombok.extern.slf4j.Slf4j;
import org.springframework.beans.factory.annotation.Autowired;
import org.springframework.web.bind.annotation.PostMapping;
import org.springframework.web.bind.annotation.RequestBody;
import org.springframework.web.bind.annotation.RequestMapping;

import org.springframework.web.bind.annotation.RestController;

/**
 * <p>
 *  前端控制器
 * </p>
 *
 * @author oxygen
 * @since 2021-05-24
 */
@RestController
@RequestMapping("/user")
@Slf4j
public class UserController {

    @Autowired
    UserService userService;

    /**
     * 用户注册
     */
    @PostMapping("/register")//@Validated
    public CommonResult register( @RequestBody RegisterDto registerDto){
        String obj = userService.register(registerDto);
        if(obj.equals("注册成功")){
            return CommonResult.success(obj);
        }else{
            return CommonResult.failed(obj);
        }

    }

    /**
     * 用户登录
     */
    @PostMapping("/login")
    public CommonResult login(@RequestBody LoginDto loginDto){
        log.info(loginDto.toString());
        String ans = userService.login(loginDto);
        if(ans.equals("用户名密码正确")){
            return CommonResult.success(ans);
        }
        return CommonResult.failed(ans);
    }
}
UserService
package com.oxygen.service;

import com.oxygen.dto.LoginDto;
import com.oxygen.dto.RegisterDto;
import com.oxygen.entity.User;
import com.baomidou.mybatisplus.extension.service.IService;

/**
 * <p>
 *  服务类
 * </p>
 *
 * @author oxygen
 * @since 2021-05-24
 */
public interface UserService extends IService<User> {

    String register(RegisterDto registerDto);

    String login(LoginDto loginDto);
}
UserServiceImpl
package com.oxygen.service.impl;

import com.oxygen.dto.LoginDto;
import com.oxygen.dto.RegisterDto;
import com.oxygen.entity.User;
import com.oxygen.mapper.UserMapper;
import com.oxygen.service.UserService;
import com.baomidou.mybatisplus.extension.service.impl.ServiceImpl;
import com.oxygen.util.MD5Utils;
import org.springframework.beans.factory.annotation.Autowired;
import org.springframework.stereotype.Service;

/**
 * <p>
 *  服务实现类
 * </p>
 *
 * @author oxygen
 * @since 2021-05-24
 */
@Service
public class UserServiceImpl extends ServiceImpl<UserMapper, User> implements UserService {

    @Autowired
    UserMapper userMapper;

    @Override
    public String register(RegisterDto ro) {
        String ans = istrue(ro);
        if(ans.equals("OK")){
            User user = new User();
            user.setNickname(ro.getNickname());user.setUsername(ro.getUsername());user.setPassword(MD5Utils.code(ro.getPassword()));
            userMapper.insert(user);
            return "注册成功";
        }
        return ans;
    }

    @Override
    public String login(LoginDto loginDto) {

        String pd = userMapper.selectPdByUsername(loginDto.getUsername());
        if(pd==null){
            return "用户名错误";
        }else if(pd.equals(MD5Utils.code(loginDto.getPassword()))){
            return "用户名密码正确";
        }
        return "密码错误";
    }

    public String istrue(RegisterDto ro){
        if(ro.getNickname()==null||ro.getNickname()==""){
            return "昵称不能为空";
        }
        if(ro.getUsername()==null||ro.getUsername()==""){
            return "账号不能为空";
        }
        if(userMapper.selectByUsername(ro.getUsername())!=null){
            return "该账号已经存在";
        }
        if(ro.getPassword()==null||ro.getPassword()==""){
            return "密码不能为空";
        }
        if(ro.getPassword().length()>16||ro.getPassword().length()<4){
            return "密码长度只能在4~16位";
        }
        return "OK";
    }
}
UserMapper
package com.oxygen.mapper;

import com.oxygen.entity.User;
import com.baomidou.mybatisplus.core.mapper.BaseMapper;
import org.apache.ibatis.annotations.Select;
import org.springframework.stereotype.Repository;

/**
 * <p>
 *  Mapper 接口
 * </p>
 *
 * @author oxygen
 * @since 2021-05-24
 */

@Repository //这个注释可以不加,以及添加了MapperScan会自动扫描
public interface UserMapper extends BaseMapper<User> {

    @Select("select id from user where username = #{username}")
    String selectByUsername(String username);

    @Select("select password from user where username = #{username}")
    String selectPdByUsername(String username);
}
至此后端已经搭建完成,前端搭建博客教程:https://blog.csdn.net/m0_46193982/article/details/117329606
联系我:

原文链接:https://blog.csdn.net/m0_46193982/article/details/117304801
所属网站分类: 技术文章 > 博客
作者:小泽圈儿郎
链接:http://www.javaheidong.com/blog/article/207578/f76dad913a862ef6b2e0/
来源:java黑洞网
任何形式的转载都请注明出处,如有侵权 一经发现 必将追究其法律责任
昵称:
评论内容:(最多支持255个字符)
---无人问津也好,技不如人也罢,你都要试着安静下来,去做自己该做的事,而不是让内心的烦躁、焦虑,坏掉你本来就不多的热情和定力