

Vue + Spring Boot + Shiro 跨域解决(开发+生产)
发布于2021-06-12 13:20 阅读(294) 评论(0) 点赞(27) 收藏(4)
相信大家刚开始做都会遇到这个问题,在网上找了好多也不管用,都写的不全,
在这里记录一下,希望对大家有所帮助
一、配置Vue前端
在config下index.js中配置代理信息
注意:这里的跨域配置只在开发环境中有效,打包部署后,这个跨域就不起作用了,本人也是这里卡了好久,Vue前端打包后,最好部署到nginx上,用nginx可以直接解决跨域问题
1、开发跨域配置
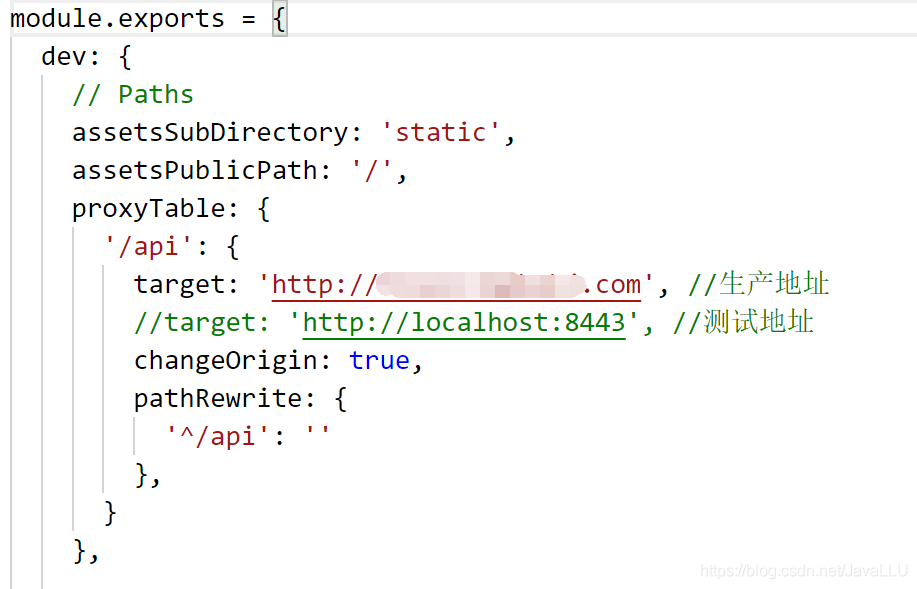
proxyTable: {
'/api': {
target: 'http://xxxx.com', //地址
changeOrigin: true,
pathRewrite: {
'^/api': ''
},
}
},
在main.js中配置Ajax代理请求

var axios = require('axios')
axios.defaults.baseURL = '/api' //环境
然后就是我们写请求方法的时候在方法前加上“/api”,这个是根据你的配置名,配的啥名就写啥
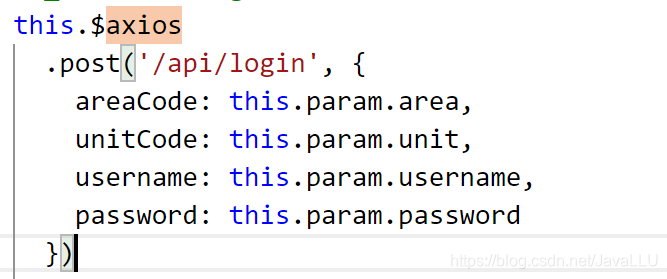
这样我们前端Vue开发跨域就配置完了
2、生产跨域配置
首先我们看一下代码配置
在网上看了大量的文章资料,说是修改这个,修改那个,事实却是然并卵。。。。
其实我们只需要在config下的index.js中配置好代理信息

proxyTable: {
'/api/*': {
target: 'http://域名', //生产地址一定要加http
changeOrigin: true,
pathRewrite: {
'^/api': '/api'
},
}
},
上面我们在配置本地跨域的时候设置了axios默认的请求路径,生产打包不需要配置

这样我们代码这里就配置完了,其他的都不要动,然后npm run build 打包就可以了
剩下的事情就交给nginx就可以了,我是在windows服务上部署的nginx,这个安装步骤网上一大堆,这里就不说了
我们安装好nginx后,需要进行一些配置
1、删除nginx下html目录里的内容
2、将我们Vue打好的包dist复制到nginx的html目录下,
3、配置nginx下config目录下nginx.conf,配置内容如下:
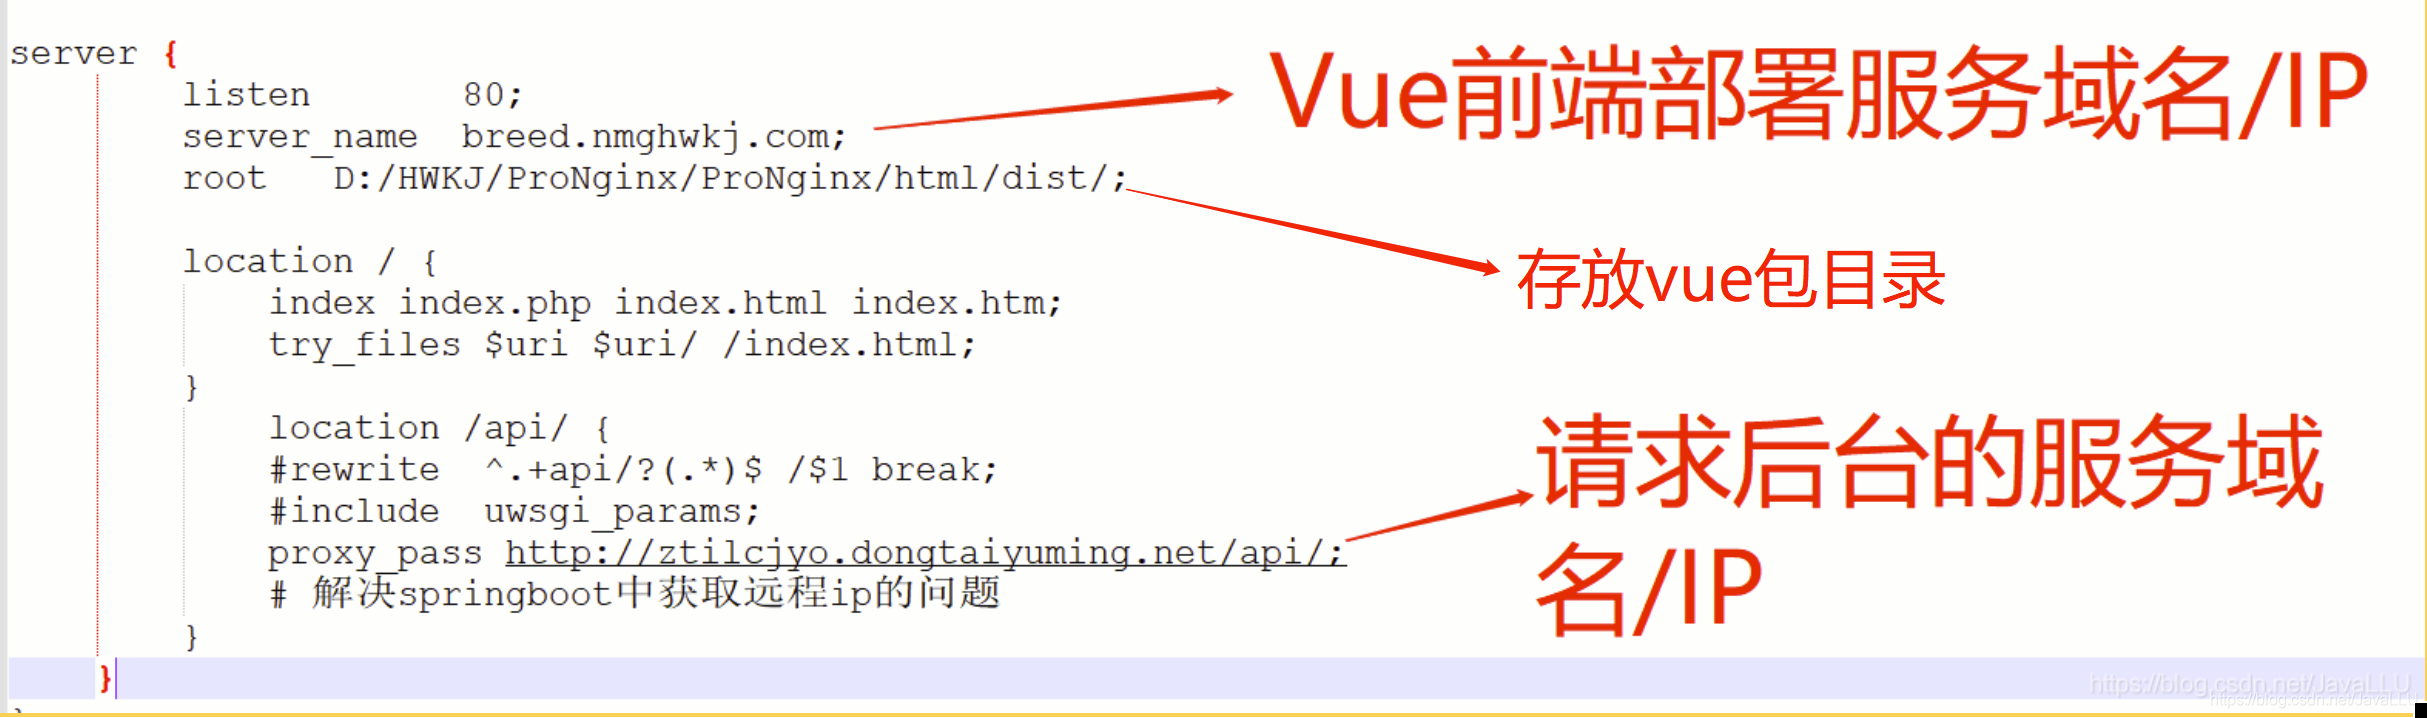
这里说明一下:nginx应用的文件目录名改一下,我们直接安装完都是nginx-1.xx,类似这样的目录,我们在配置上图中的root路径时,/n可能会有编译问题,我这里是改成了ProNginx,大家可以改为自己喜欢的名
这是我nginx的所有配置
#user nobody;
worker_processes 1;
#error_log logs/error.log;
#error_log logs/error.log notice;
#error_log logs/error.log info;
#pid logs/nginx.pid;
events {
worker_connections 1024;
}
http {
include mime.types;
default_type application/octet-stream;
#log_format main '$remote_addr - $remote_user [$time_local] "$request" '
# '$status $body_bytes_sent "$http_referer" '
# '"$http_user_agent" "$http_x_forwarded_for"';
#access_log logs/access.log main;
sendfile on;
#tcp_nopush on;
#keepalive_timeout 0;
keepalive_timeout 65;
#gzip on;
server {
listen 80;
server_name 前台服务域名/IP;
root D:/HWKJ/ProNginx/ProNginx/html/dist/;
location / {
index index.php index.html index.htm;
try_files $uri $uri/ /index.html;
}
location /api/ {
#rewrite ^.+api/?(.*)$ /$1 break;
#include uwsgi_params;
proxy_pass http://xxx后台xxxx/api/;
# 解决springboot中获取远程ip的问题
}
}
}
配置完后我们启动nginx,以下是nginx一些操作命令
start nginx //启动
nginx -s stop // stop是快速停止nginx,可能并不保存相关信息
nginx -s quit // quit是完整有序的停止nginx,并保存相关信息
nginx -s reload // 当配置信息修改,需要重新载入这些配置时使用此命令
nginx -s reopen // 重新打开日志文件
nginx -v // 查看Nginx版本
这样我们前端Vue生产跨域就配置完了
下面我们配置spring boot后台
二、配置spring boot
如果说你是单只有spring boot那么你配置一下信息即可
import org.springframework.boot.SpringBootConfiguration;
import org.springframework.boot.web.servlet.FilterRegistrationBean;
import org.springframework.context.annotation.Bean;
import org.springframework.context.annotation.Configuration;
import org.springframework.web.cors.CorsConfiguration;
import org.springframework.web.cors.UrlBasedCorsConfigurationSource;
import org.springframework.web.filter.CorsFilter;
import org.springframework.web.servlet.config.annotation.*;
/**
*/
@Configuration
public class MyWebConfigurer implements WebMvcConfigurer {
@Override
public void addCorsMappings(CorsRegistry registry) {
registry.addMapping("/**") // 允许跨域访问的路径
.allowCredentials(true) // 是否发送cookie
.allowedOriginPatterns("*") // 允许跨域访问的源
.allowedMethods("POST", "GET", "PUT", "OPTIONS", "DELETE") // 允许请求方法
.allowedHeaders("*") // 允许头部设置
.maxAge(168000) ; // 预检间隔时间
}
}
如果你的spring boot后台整合了shiro,那上面的配置对走shiro的请求不会生效,浏览器还是会提示跨域,因此我们用下列方法设置允许跨域访问
import org.springframework.boot.SpringBootConfiguration;
import org.springframework.boot.web.servlet.FilterRegistrationBean;
import org.springframework.context.annotation.Bean;
import org.springframework.context.annotation.Configuration;
import org.springframework.web.cors.CorsConfiguration;
import org.springframework.web.cors.UrlBasedCorsConfigurationSource;
import org.springframework.web.filter.CorsFilter;
import org.springframework.web.servlet.config.annotation.*;
/**
*/
@Configuration
public class MyWebConfigurer implements WebMvcConfigurer {
@Bean
public FilterRegistrationBean corsFilter() {
final UrlBasedCorsConfigurationSource source = new UrlBasedCorsConfigurationSource();
final CorsConfiguration config = new CorsConfiguration();
// 允许cookies跨域
config.setAllowCredentials(true);
// #允许向该服务器提交请求的URI,*表示全部允许,在SpringMVC中,如果设成*,会自动转成当前请求头中的Origin
config.addAllowedOriginPattern("*");
// #允许访问的头信息,*表示全部
config.addAllowedHeader("*");
// 预检请求的缓存时间(秒),即在这个时间段里,对于相同的跨域请求不会再预检了
config.setMaxAge(18000L);
// 允许提交请求的方法,*表示全部允许
config.addAllowedMethod("OPTIONS");
config.addAllowedMethod("HEAD");
config.addAllowedMethod("GET");
config.addAllowedMethod("PUT");
config.addAllowedMethod("POST");
config.addAllowedMethod("DELETE");
config.addAllowedMethod("PATCH");
source.registerCorsConfiguration("/**", config);
FilterRegistrationBean bean = new FilterRegistrationBean(new CorsFilter(source));
// 设置监听器的优先级
bean.setOrder(0);
return bean;
}
}
以上就是解决跨域方法,看完记得点赞哦
原文链接:https://blog.csdn.net/JavaLLU/article/details/117676759
所属网站分类: 技术文章 > 博客
作者:java之恋
链接:http://www.javaheidong.com/blog/article/221797/5474036424664296e33c/
来源:java黑洞网
任何形式的转载都请注明出处,如有侵权 一经发现 必将追究其法律责任
昵称:
评论内容:(最多支持255个字符)
---无人问津也好,技不如人也罢,你都要试着安静下来,去做自己该做的事,而不是让内心的烦躁、焦虑,坏掉你本来就不多的热情和定力