

Linux 部署Nacos集群,最新教程,细到极致
发布于2022-08-02 03:04 阅读(1535) 评论(0) 点赞(18) 收藏(5)
大家中午好呀,五一放假了,真爽。还没想好怎么玩,先躺尸一天再说。然后中午起来后,搞点学习。之前一直有个想法,搭建Nacos集群,今天正好有时间,整起。
开始搭建Nacos集群,这次Nacos版本是2.1.0
1、首先强烈建议大家看下官方文档,上面有详细步骤,写得很好
Nacos集群官方文档
2、准备3台服务器(记得安装JDK),如果没有,Jdk安装教程,另外,老哥之前有2台服务器,今天为了搭建集群,吐血巨款,再买一台。
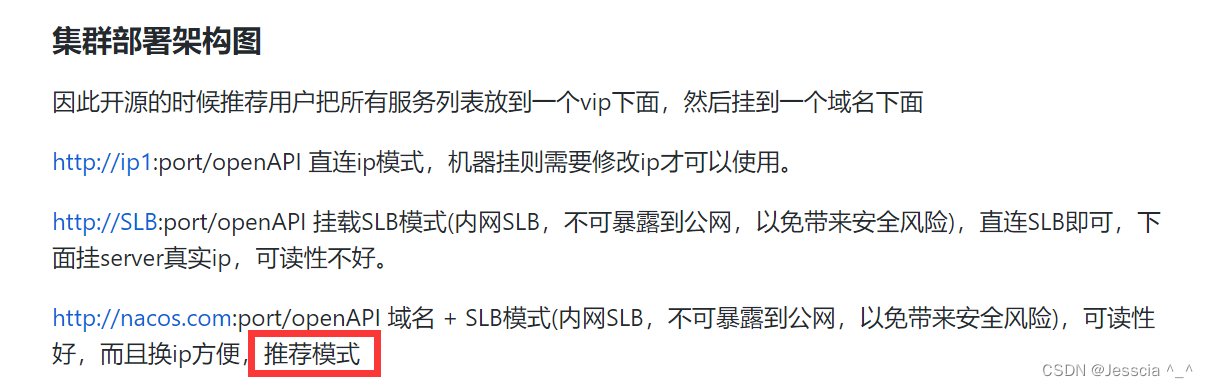
3、Nacos集群有三种模式,老哥按照官方推荐,采用第三种
3A、下载Linux版本Nacos2.1.0,Github地址
5、分别手动安装包上传到3台服务器,查看
[root@VM-4-12-centos opt]# mkdir nacos1
[root@VM-12-13-centos opt]# cd nacos1
[root@VM-4-12-centos nacos1]# pwd
/opt/nacos1
[root@VM-4-12-centos nacos1]# ll
total 114700
-rw-r--r-- 1 root root 117452521 Apr 30 13:22 nacos-server-2.1.0.tar.gz
[root@VM-4-2-centos opt]# mkdir nacos2
[root@VM-4-2-centos opt]# cd nacos2/
[root@VM-4-2-centos nacos2]# pwd
/opt/nacos2
[root@VM-4-2-centos nacos2]# ll
total 114700
-rw-r--r-- 1 root root 117452521 Apr 30 13:22 nacos-server-2.1.0.tar.gz
[root@VM-12-13-centos opt]# mkdir nacos3
[root@VM-12-13-centos opt]# cd nacos3/
[root@VM-12-13-centos nacos3]# pwd
/opt/nacos3
[root@VM-12-13-centos nacos3]# ll
total 114704
-rw-r--r-- 1 root root 117452521 Apr 30 13:22 nacos-server-2.1.0.tar.gz
6、解压
[root@VM-4-12-centos nacos1]# tar -zxvf nacos-server-2.1.0.tar.gz
[root@VM-4-2-centos nacos2]# tar -zxvf nacos-server-2.1.0.tar.gz
[root@VM-12-13-centos nacos3]# tar -zxvf nacos-server-2.1.0.tar.gz
7、首先需要知道Nacos有个默认的内嵌数据库,是derby,但是我们需要换成mysql,方便我们后面管理,然后需要搭建一个Mysql,没有搭建Mysql的,Linux安装Mysql5.7教程
8、连接Mysql数据库
[root@VM-4-12-centos conf]# mysql -u root -p
Enter password:
Welcome to the MySQL monitor.  Commands end with ; or \g.
Your MySQL connection id is 9
Server version: 5.7.26 MySQL Community Server (GPL)

Copyright (c) 2000, 2019, Oracle and/or its affiliates. All rights reserved.

Oracle is a registered trademark of Oracle Corporation and/or its
affiliates. Other names may be trademarks of their respective
owners.

Type 'help;' or '\h' for help. Type '\c' to clear the current input statement.

mysql>
9、创建一个数据库
mysql> create database nacos_config;
Query OK, 1 row affected (0.00 sec)

mysql> show databases;
+--------------------+
| Database           |
+--------------------+
| information_schema |
| mysql              |
| nacos_config       |
| performance_schema |
| sys                |
+--------------------+
5 rows in set (0.00 sec)
10、使用 nacos_config;,然后执行Nacos 文件夹下conf的sql文件
mysql> use nacos_config
Database changed
mysql> source /opt/nacos1/nacos/conf/nacos-mysql.sql;
Query OK, 0 rows affected (0.03 sec)

Query OK, 0 rows affected (0.02 sec)

Query OK, 0 rows affected (0.04 sec)

Query OK, 0 rows affected (0.03 sec)

Query OK, 0 rows affected (0.05 sec)

Query OK, 0 rows affected (0.03 sec)

Query OK, 0 rows affected (0.04 sec)

Query OK, 0 rows affected (0.03 sec)

Query OK, 0 rows affected (0.20 sec)

Query OK, 0 rows affected (0.03 sec)

Query OK, 0 rows affected (0.03 sec)

Query OK, 0 rows affected (0.03 sec)

Query OK, 1 row affected (0.01 sec)
11、退出mysql
mysql> exit
Bye
12、修改 application.properties,以mysql方式持久化,这里需要注意的是,集群模式必须配自己的独立ip
[root@VM-4-12-centos conf]# vi application.properties
### Specify local server's IP:
nacos.inetutils.ip-address=101.34.7.236

spring.datasource.platform=mysql

db.num=1
db.url.0=jdbc:mysql://101.34.7.236:3306/nacos_config?characterEncoding=utf8&connectTimeout=1000&socket
Timeout=3000&autoReconnect=true
db.user=root
db.password=your password
13、复制一份集群配置文件
[root@VM-4-12-centos conf]# cp cluster.conf.example cluster.conf
14、查看本地ip,然后增加集群配置,格式为ip+端口号
[root@VM-4-12-centos conf]# curl ifconfig.me
[root@VM-4-12-centos conf]# vi cluster.conf
#it is ip
#example

101.34.7.236:8848
101.35.245.191:8848
124.222.204.94:8848
15、进入Nacos bin 目录下
[root@VM-4-12-centos conf]# cd ../
[root@VM-4-12-centos nacos]# cd bin
[root@VM-4-12-centos bin]# ll
total 28
-rwxr-xr-x 1  502 games  954 May 14  2020 shutdown.cmd
-rwxr-xr-x 1  502 games  951 Dec 14 19:36 shutdown.sh
-rwxr-xr-x 1  502 games 3368 Jan 12 17:02 startup.cmd
-rwxr-xr-x 1  502 games 5136 Jan 12 17:02 startup.sh
16、启动一台Nacos
[root@VM-4-12-centos bin]# ./startup.sh -m cluster
/opt/jdk01/jdk1.8.0_311/bin/java -Djava.ext.dirs=/opt/jdk01/jdk1.8.0_311/jre/lib/ext:/opt/jdk01/jdk1.8.0_311/lib/ext  -server -Xms2g -Xmx2g -Xmn1g -XX:MetaspaceSize=128m -XX:MaxMetaspaceSize=320m -XX:-OmitStackTraceInFastThrow -XX:+HeapDumpOnOutOfMemoryError -XX:HeapDumpPath=/opt/nacos1/nacos/logs/java_heapdump.hprof -XX:-UseLargePages -Dnacos.member.list= -Xloggc:/opt/nacos1/nacos/logs/nacos_gc.log -verbose:gc -XX:+PrintGCDetails -XX:+PrintGCDateStamps -XX:+PrintGCTimeStamps -XX:+UseGCLogFileRotation -XX:NumberOfGCLogFiles=10 -XX:GCLogFileSize=100M -Dloader.path=/opt/nacos1/nacos/plugins/health,/opt/nacos1/nacos/plugins/cmdb,/opt/nacos1/nacos/plugins/selector -Dnacos.home=/opt/nacos1/nacos -jar /opt/nacos1/nacos/target/nacos-server.jar  --spring.config.additional-location=file:/opt/nacos1/nacos/conf/ --logging.config=/opt/nacos1/nacos/conf/nacos-logback.xml --server.max-http-header-size=524288
nacos is starting with cluster
nacos is starting,you can check the /opt/nacos1/nacos/logs/start.out
17、修改第二台服务器
[root@VM-4-2-centos nacos]# pwd
/opt/nacos2/nacos
[root@VM-4-2-centos nacos]# cd conf/
[root@VM-4-2-centos conf]#  vi application.properties
### Specify local server's IP:
nacos.inetutils.ip-address=101.35.245.191

spring.datasource.platform=mysql

db.num=1
db.url.0=jdbc:mysql://101.34.7.236:3306/nacos_config?characterEncoding=utf8&connectTimeout=1000&socket
Timeout=3000&autoReconnect=true
db.user=root
db.password=your password
18、修改配置
[root@VM-4-2-centos conf]# vi cluster.conf
#it is ip
#example
101.34.7.236:8848
101.35.245.191:8848
124.222.204.94:8848
19、启动第二台
[root@VM-4-2-centos conf]# cd ../bin/
[root@VM-4-2-centos bin]# ./startup.sh -m cluster
20、第三台跟前面一样,这里就不写了。
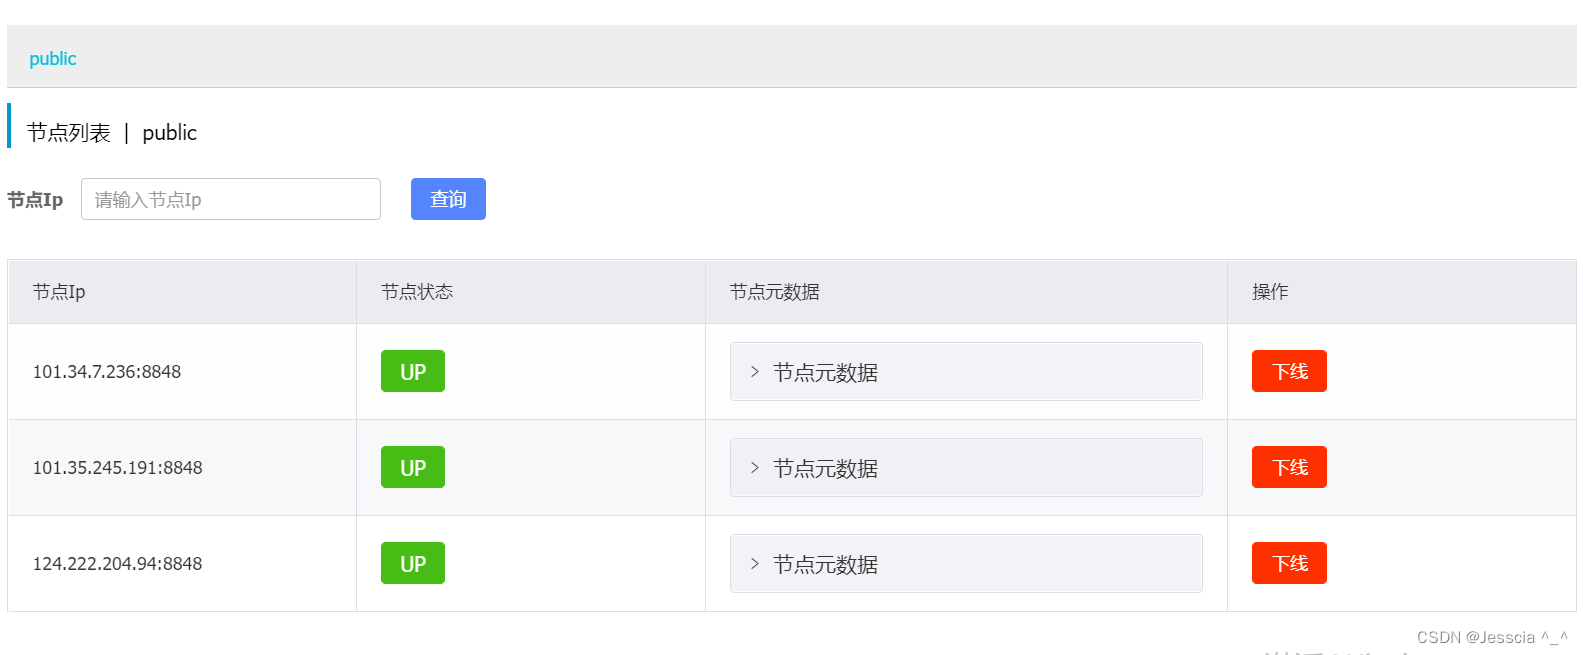
21、三台服务器启动完成以后,需要开通服务器端口8848,然后任意一台连接上去
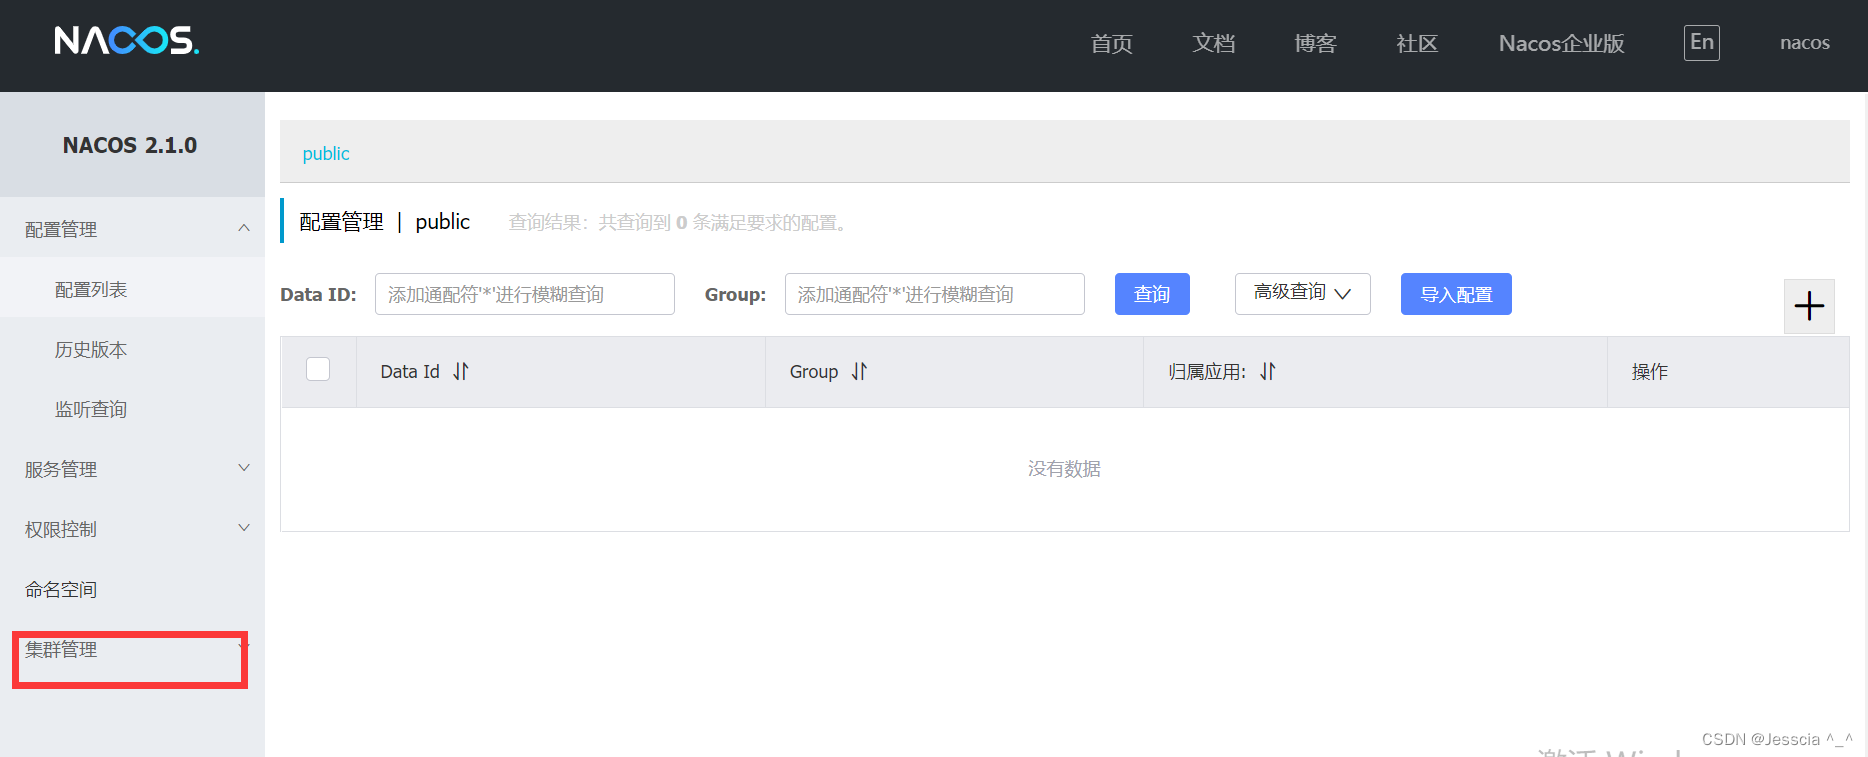
22、点击集群管理,成功!
23、到了这里,集群部分已经结束了,但是按照官方要求,不要暴露ip到外网,尽量用域名,所以需要用到Nginx,不会Nginx安装的,Nginx安装教程
24、修改nginx的 nginx.conf文件
 upstream cluster{
 server 101.34.7.236:8848;
 server 101.35.245.191:8848;
 server 124.222.204.94:8848;
}

 server {
        listen       443 ssl;
        server_name  你的域名或者公网ip;

        ssl_certificate      xxxxxx.crt(注意这里修改);
        ssl_certificate_key  xxxxxxx.key(注意这里修改);

        ssl_session_cache    shared:SSL:1m;
        ssl_session_timeout  5m;

        ssl_ciphers  HIGH:!aNULL:!MD5;
        ssl_prefer_server_ciphers  on;

        location / {
            proxy_pass http://cluster;
        }
    }
25、访问老哥的域名https://666java.top/nacos/,成功!
26、写到这里,就默默的说一句,屏幕前的各位大帅逼,还有大漂亮,看到这里,麻烦给老哥一个点赞、关注、收藏三连好吗,你的支持是老哥更新最大的动力,谢谢!
原文链接:https://blog.csdn.net/gubeichengxuyuan/article/details/124511446
所属网站分类: 技术文章 > 博客
作者:想要飞翔的天使
链接:http://www.javaheidong.com/blog/article/471603/c04739243ce86a8d449c/
来源:java黑洞网
任何形式的转载都请注明出处,如有侵权 一经发现 必将追究其法律责任
昵称:
评论内容:(最多支持255个字符)
---无人问津也好,技不如人也罢,你都要试着安静下来,去做自己该做的事,而不是让内心的烦躁、焦虑,坏掉你本来就不多的热情和定力