

Spring Boot 系列三:如何自定义一个SpringBoot Srarter
发布于2022-08-07 20:38 阅读(1002) 评论(0) 点赞(20) 收藏(5)
前言:
上一期我们通过学习知道了自动配置原理,其实创建一个自定义SpringBoot Starter也很简单。
目录
首先创建一个项目,命名为demo-spring-boot-starter,引入SpringBoot相关依赖
如何自定义一个SpringBoot Srarter?
首先创建一个项目,命名为demo-spring-boot-starter,引入SpringBoot相关依赖
- <dependency>
- <groupId>org.springframework.boot</groupId>
- <artifactId>spring-boot-starter</artifactId>
- </dependency>
- <dependency>
- <groupId>org.springframework.boot</groupId>
- <artifactId>spring-boot-configuration-processor</artifactId>
- <optional>true</optional>
- </dependency>
-
编写配置文件
这里定义了属性配置的前缀
- @ConfigurationProperties(prefix = "hello")
- public class HelloProperties {
- private String name;
- //省略getter、setter
- }
-
自动装配
创建自动配置类HelloPropertiesConfigure
- @Configuration
- @EnableConfigurationProperties(HelloProperties.class)
- public class HelloPropertiesConfigure {
- }
-
配置自动类
在
/resources/META-INF/spring.factories文件中添加自动配置类路径- org.springframework.boot.autoconfigure.EnableAutoConfiguration=\
- cn.fighter3.demo.starter.configure.HelloPropertiesConfigure
-
测试
至此,随手写的一个自定义SpringBoot-Starter就完成了,虽然比较简单,但是完成了主要的自动装配的能力。
-
创建一个工程,引入自定义starter依赖
- <dependency>
- <groupId>cn.fighter3</groupId>
- <artifactId>demo-spring-boot-starter</artifactId>
- <version>0.0.1-SNAPSHOT</version>
- </dependency>
-
在配置文件里添加配置
hello.name=张三 -
测试类
- @RunWith(SpringRunner.class)
- @SpringBootTest
- public class HelloTest {
- @Autowired
- HelloProperties helloProperties;
- @Test
- public void hello(){
- System.out.println("你好,"+helloProperties.getName());
- }
- }
-
运行结果
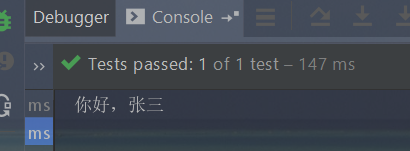
运行结果
-
本期分享到此为止,关注博主不迷路,叶秋学长带你上高速~~
原文链接:https://blog.csdn.net/m0_63722685/article/details/126082845
所属网站分类: 技术文章 > 博客
作者:javagogogo
链接:http://www.javaheidong.com/blog/article/472566/ec8efbec5916b9599b3d/
来源:java黑洞网
任何形式的转载都请注明出处,如有侵权 一经发现 必将追究其法律责任
昵称:
评论内容:(最多支持255个字符)
---无人问津也好,技不如人也罢,你都要试着安静下来,去做自己该做的事,而不是让内心的烦躁、焦虑,坏掉你本来就不多的热情和定力